shatter me pdf full book

The Shatter Me series, written by Tahereh Mafi, is a captivating young adult dystopian thriller; Published in 2011, it follows Juliette, a girl with extraordinary abilities, in a crumbling world․ The series blends intense action, emotional depth, and a unique narrative voice, with strike-through text reflecting Juliette’s fragmented thoughts․ Its success led to multiple sequels, novellas, and a spin-off, Watch Me, expanding the universe․ Fans praise its relatable characters and gripping plot, making it a standout in YA fiction․

Overview of the Series

The Shatter Me series, written by Tahereh Mafi, is a young adult dystopian thriller that captivates readers with its unique narrative style and emotional depth․ The series follows Juliette, a powerful yet fragile protagonist, as she navigates a crumbling world dominated by The Reestablishment․ With its blend of action, romance, and self-discovery, the series explores themes of power, control, and resilience, offering a gripping journey through a fractured society․

Author Background: Tahereh Mafi

Tahereh Mafi is a New York Times and USA Today bestselling author, born on November 9, 1988, in Connecticut․ Known for her lyrical prose, she gained acclaim with the Shatter Me series, which has been translated into over 30 languages․ Mafi’s work often explores themes of identity, power, and resilience, resonating deeply with readers worldwide․ Her unique narrative voice and emotional storytelling have solidified her place in young adult literature․

Key Themes and Genres

The Shatter Me series is a young adult dystopian thriller with strong romantic elements․ Set in a post-apocalyptic world, it explores themes of power, control, and rebellion․ The story delves into identity, survival, and the complexities of human relationships․ Mafi’s vivid portrayal of a crumbling society and Juliette’s journey from captivity to empowerment defines the series․ Its unique blend of action, emotion, and dystopian intrigue captivates readers, making it a standout in YA fiction․

Plot Summary of “Shatter Me”

In a dystopian world, Juliette, a 17-year-old with a lethal touch, is freed by Adam, uncovering a complex web of rebellion, romance, and self-discovery․

Main Characters and Their Roles

Juliette: The protagonist, a young girl with a lethal touch, struggling to find strength and purpose in a broken world․ Adam: Juliette’s childhood friend and ally, whose loyalty and love drive her journey․ Warner: The complex antagonist with a dark past and hidden vulnerability, whose actions shape the story’s tension․ Together, they navigate a world of power struggles, rebellion, and emotional battles, each playing pivotal roles in the fight for freedom and redemption․

Setting and World-Building

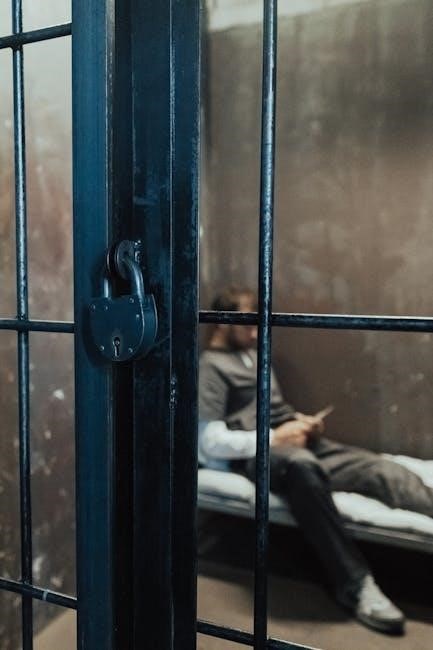
The Shatter Me series is set in a dystopian world where societal collapse and environmental disasters have ravaged the planet․ The Reestablishment, a totalitarian regime, controls the remaining resources, imposing harsh rule․ Juliette’s confinement in a cell symbolizes the oppressive regime’s power․ The world is plagued by diseases, food scarcity, and chaos, creating a bleak backdrop for Juliette’s fight for freedom and self-discovery, blending personal and global struggles seamlessly․

Central Conflict and Resolution

The core conflict revolves around Juliette’s internal struggle for empowerment and her fight against The Reestablishment’s tyranny․ Captured and exploited for her lethal touch, Juliette must decide whether to resist or conform․ Her reunion with Adam, a childhood friend, and her complicated dynamic with Warner, a conflicted leader, drive the narrative․ Ultimately, Juliette embraces her strength, leading to a climactic confrontation that sets the stage for her journey toward revolution and self-liberation, reshaping the world’s fate․

Book Series Order and Structure

The Shatter Me series by Tahereh Mafi includes six main novels and five novellas, with the first book published in 2011․ The series follows Juliette’s journey chronologically, blending dystopian and romantic elements, and includes spin-offs like Watch Me, expanding the universe and deepening character development, while maintaining a cohesive narrative thread throughout․

Shatter Me Series: Complete List of Books

The Shatter Me series by Tahereh Mafi includes six main novels: Shatter Me, Unravel Me, Ignite Me, Restore Me, Defy Me, and Imagine Me․ Additionally, there are five novellas: Destroy Me, Fracture Me, Annihilate Me, Believe Me, and Shatter Me: Believe Me 6․5․ These books and novellas provide a comprehensive narrative arc, exploring Juliette’s journey and the dystopian world she inhabits․ The latest addition, Believe Me, was released in 2023 by HarperCollins․

Understanding the Reading Order

To fully appreciate the Shatter Me series, readers should follow the chronological order․ Start with Shatter Me, followed by Unravel Me, and Ignite Me․ The story continues with Restore Me, Defy Me, and concludes with Imagine Me․ Novellas like Destroy Me and Fracture Me provide deeper insights into secondary characters․ The latest installment, Believe Me, released in 2023 by HarperCollins, offers a fresh perspective, enriching the series’ dystopian landscape․

Novellas and Spin-Offs in the Series

The Shatter Me series includes several novellas and a recent spin-off․ Destroy Me and Fracture Me offer insights into Warner and Adam, while the new spin-off Watch Me, released in April 2025 by Storytide (HarperCollins), expands the universe a decade after The Reestablishment’s fall․ These additions further enrich the series, providing deeper character perspectives and new narratives for fans to explore․

Where to Find “Shatter Me” PDF

The Shatter Me PDF can be found on official platforms like Amazon, Barnes & Noble, and Kobo․ Ensure legal downloads to support authors and avoid pirated copies․

Official Sources for E-Books

Official e-book sources for Shatter Me include Amazon Kindle, Barnes & Noble Nook, and Kobo․ These platforms offer legal downloads, ensuring quality and supporting authors․ Avoid unauthorized sites to prevent pirated content․

Importance of Legal and Safe Downloads

Downloading Shatter Me legally ensures quality, supports the author, and avoids malware risks․ Pirated content harms creators and can compromise your device․ Always choose official platforms to respect intellectual property and stay safe online․

Alternatives to PDF: Audiobooks and Paperbacks

Audiobooks and paperbacks are excellent alternatives to PDFs․ Audiobooks offer a convenient, immersive experience, with professional narration bringing Juliette’s story to life․ Paperbacks provide a tactile reading experience, ideal for collectors․ Both formats are widely available on official platforms like Litres, ensuring quality and supporting the author․ They cater to preferences beyond digital reading, making the series accessible in diverse ways․

Author’s Writing Style and Influence

Tahereh Mafi’s unique narrative voice captivates readers with poetic prose, emotional depth, and a distinctive style․ Her strike-through text reflects Juliette’s fragmented thoughts, enhancing the storytelling experience․ Her influence on YA fiction is undeniable, inspiring many with her creative storytelling and relatable characters, solidifying her place as a bestselling author in the genre․

Tahereh Mafi’s Unique Narrative Voice

Tahereh Mafi’s writing is renowned for its poetic, emotive prose and a distinctive stream-of-consciousness style․ In Shatter Me, Juliette’s voice is raw and intimate, with strike-through text symbolizing her fragmented thoughts․ This technique immerses readers in her psyche, creating a visceral connection․ Mafi’s lyrical language and innovative storytelling have redefined YA fiction, making her a standout author in the dystopian genre and captivating fans worldwide with her unforgettable narratives․

Impact of the Series on Young Adult Fiction

The Shatter Me series has been a game-changer in young adult fiction, blending dystopian themes with emotional depth and romance․ Tahereh Mafi’s unique narrative style and Juliette’s compelling journey inspired a wave of similar stories․ The series’ success revitalized the YA dystopian genre, encouraging authors to explore complex characters and moral dilemmas․ Its influence is evident in its dedicated fan base and the rise of novels featuring strong, flawed heroines in post-apocalyptic settings․ Mafi’s work continues to resonate widely․

Reception by Critics and Readers

The Shatter Me series has garnered significant critical acclaim and a dedicated fan base․ Tahereh Mafi’s unique narrative voice and Juliette’s emotional journey have resonated deeply with readers․ The series’ blend of dystopian elements and romantic tension has solidified its place in young adult fiction․ Its success is evident in its bestseller status and the passionate community it has fostered․

Spin-Off Series: “Watch Me”

Release Date and Publisher Information

Watch Me, the first book in Tahereh Mafi’s new spin-off series, is set to release on April 15, 2025․ Published by Storytide, a new imprint of HarperCollins Children’s Books, this installment promises to expand the Shatter Me universe with fresh perspectives and gripping storytelling, continuing the legacy of the original series․

Tahereh Mafi’s Watch Me introduces a fresh chapter in the Shatter Me universe, set a decade after the fall of The Reestablishment․ This spin-off explores Juliette’s journey as she faces new challenges and uncovers hidden truths about her past․ The story delves into themes of power, identity, and redemption, offering fans a deeper connection to beloved characters while expanding the dystopian world they adore․ Watch Me promises pulse-pounding action and emotional depth, reigniting the series’ magic․

Connection to the Original Series

Watch Me seamlessly connects to the original Shatter Me series, continuing Juliette’s story a decade later․ The spin-off maintains the dystopian backdrop and explores unresolved conflicts while introducing new characters․ Themes of power, love, and survival remain central, offering a fresh perspective on Juliette’s journey․ The narrative ties back to key events and relationships from the original series, ensuring a cohesive and engaging experience for fans of the Shatter Me universe․

Tahereh Mafi’s Watch Me, the first book in the spin-off series, was released on April 15, 2025, by Storytide, a new imprint of HarperCollins Children’s Books․ The original Shatter Me series was also published by HarperCollins, beginning with the first book in 2011․ This new installment continues Juliette’s story, offering fans a fresh yet familiar journey within the same dystopian universe, with anticipation building for further releases in the series․

Themes and Symbolism in “Shatter Me”

The series explores themes of power, control, and self-discovery, with Juliette’s journey symbolizing inner strength․ The strike-through text reflects her fractured mind, emphasizing emotional turmoil and growth․

Dystopian Elements and Their Significance

The series portrays a crumbling world plagued by disease, starvation, and environmental collapse․ The oppressive regime, The Reestablishment, symbolizes humanity’s downfall, emphasizing themes of control and resistance․ Juliette’s captivity and unique abilities highlight the exploitation of power, showcasing the dangers of authoritarian rule․ These dystopian elements create a tense atmosphere, underscoring Juliette’s internal struggle and the fight for hope in a shattered society․

Exploration of Power and Control

The series delves into power dynamics, with The Reestablishment wielding absolute control, crushing dissent․ Juliette’s abilities symbolize resistance against oppression, challenging the status quo․ Through her journey, the narrative examines how power corrupts and the resilience of the human spirit․ The interplay between authority and rebellion highlights themes of freedom, sacrifice, and the struggle for justice in a world dominated by fear and manipulation․

Love and Relationships in the Story

Love and relationships are central to Juliette’s journey, shaping her identity and motivations․ Her connections with Adam and Warner create a complex love triangle, exploring themes of loyalty, trust, and sacrifice․ These relationships evolve amid the dystopian chaos, highlighting the power of human bonds in a broken world․ The narrative delves into Juliette’s emotional growth, as she learns to trust others and herself, ultimately finding strength through love and companionship․

Character Development and Analysis

Juliette’s transformation from a fragile captive to a powerful leader drives the series․ Her journey explores resilience, self-discovery, and the complexities of human relationships, shaping her identity and purpose․

Juliette’s Journey and Growth

Juliette’s transformation from a vulnerable girl to a resilient leader is central to the series․ Initially isolated and broken, she discovers inner strength, embracing her powers and voice․ Her relationships with Adam and Warner shape her identity, revealing a complex, multifaceted character․ Through trials, Juliette learns to trust herself, becoming a symbol of hope in a shattered world, showcasing her remarkable growth and determination․

Adam and Warner: Complex Characters

Adam and Warner are pivotal figures in Juliette’s life, each representing contrasting ideals․ Adam, her childhood friend, embodies loyalty and kindness, while Warner, the commanding leader, hides vulnerability beneath his harsh exterior․ Their complex dynamics with Juliette drive the story, exploring themes of trust, betrayal, and redemption․ Both characters undergo significant development, revealing their multifaceted personalities and moral ambiguities, making them central to the series’ emotional depth and intrigue․

Supporting Characters and Their Roles

Supporting characters like Kenji, Adam’s brother James, and the enigmatic Andersons add depth to the narrative․ Kenji, Juliette’s loyal friend, provides humor and unwavering support, while James embodies innocence and hope․ The Andersons, with their mysterious pasts, play crucial roles in the rebellion․ These characters not only aid Juliette’s growth but also enrich the world-building, offering diverse perspectives and motivations that shape the story’s progression and emotional impact․

Reception and Cultural Impact

The Shatter Me series has left a lasting mark on young adult fiction, inspiring a dedicated fanbase and influencing the dystopian genre․ Its unique storytelling has sparked widespread discussion and admiration, solidifying its place in contemporary YA literature․ The series continues to resonate with readers, fostering a vibrant community of enthusiasts worldwide․

Book Reviews and Ratings

The Shatter Me series has garnered widespread acclaim, with high ratings on platforms like Amazon (4․7/5) and Goodreads (4․4/5)․ Critics praise its emotional depth, strong characters, and Tahereh Mafi’s unique writing style․ Readers highlight Juliette’s growth and the series’ blend of dystopian themes with romantic elements․ Its impact on YA fiction is undeniable, making it a favorite among fans of the genre and a standout in modern literature․

Awards and Recognition

The Shatter Me series has achieved significant acclaim, becoming a New York Times and USA Today bestseller․ Tahereh Mafi’s work has been translated into over 30 languages, showcasing its global appeal․ While not directly awarded major literary prizes, the series’ success lies in its dedicated fanbase and influence on YA dystopian fiction․ Its impact has solidified Mafi’s reputation as a leading author in the genre, with continued recognition through spin-offs like Watch Me․

Fandom and Community Engagement

The Shatter Me series has fostered a passionate fanbase, with readers actively engaging through social media, fan art, and fan fiction․ Tahereh Mafi’s interactive presence on platforms like Instagram and Twitter has strengthened her connection with fans․ The series’ relatable characters and emotional depth have inspired countless online discussions, making it a cultural phenomenon within the YA community․ This dedication highlights the series’ lasting impact and its ability to unite readers worldwide․

Similar Books and Recommendations

Fans of Shatter Me often enjoy YA dystopian novels like Divergent and The Hunger Games․ These books share similar themes of rebellion, survival, and pulse-pounding action, with strong protagonists․

Books Like “Shatter Me”

Readers who enjoy Shatter Me often gravitate toward YA dystopian novels with strong protagonists and gripping plots․ Divergent by Veronica Roth and The Hunger Games by Suzanne Collins are top recommendations, featuring rebellion and survival themes․ Legend by Marie Lu and The Darkest Minds by Alexandra Bracken also offer similar blends of action and emotional depth․ For fans of dystopian romance, Red Queen by Victoria Aveyard is a compelling choice, exploring power struggles and forbidden love․

YA Dystopian Recommendations

For fans of Shatter Me, other compelling YA dystopian novels include The Hunger Games by Suzanne Collins, Divergent by Veronica Roth, and The Maze Runner by James Dashner․ These stories explore oppressive regimes, rebellion, and survival, with strong protagonists․ Fahrenheit 451 by Ray Bradbury and The Giver by Lois Lowry also offer timeless themes of conformity and resistance․ Each series delivers gripping narratives and thought-provoking worlds, perfect for lovers of dystopian fiction․

Romantic Thriller Suggestions

Fans of Shatter Me’s blend of romance and suspense may enjoy Delirium by Lauren Oliver, set in a world where love is outlawed․ Panic by Lauren Oliver and The Darkest Minds by Alexandra Bracken also combine thrilling plots with emotional depth․ For a dystopian romance, The Red Queen by Victoria Aveyard explores a divided world with forbidden love․ Each offers a gripping narrative with intense relationships, perfect for readers seeking romantic thrills․

Shatter Me captivates with its emotional depth and unique narrative style․ Tahereh Mafi’s influence on YA fiction is undeniable, leaving readers eager for more․ A must-read series!

Why “Shatter Me” Matters

Tahereh Mafi’s Shatter Me series stands out for its unique narrative voice and emotional depth․ Juliette’s journey from vulnerability to empowerment resonates deeply, blending dystopian elements with relatable struggles․ The series’ exploration of power, identity, and love offers more than just entertainment—it challenges readers to reflect on their own resilience and humanity․ Its influence on YA fiction underscores its lasting impact and relevance․

Encouragement to Read the Series

If you’re drawn to dystopian thrillers with complex characters and emotional depth, the Shatter Me series is a must-read․ Tahereh Mafi’s unique writing style and Juliette’s compelling journey make it a standout in YA fiction․ The series’ blend of action, romance, and self-discovery will captivate you, leaving you eager to explore the entire universe Mafi has crafted․ Dive into this gripping world and experience the magic for yourself․

Future of the Series and Author

Tahereh Mafi continues to expand the Shatter Me universe with new projects, including the spin-off series Watch Me, set a decade after the original story․ This new installment introduces fresh characters while maintaining the series’ signature blend of dystopian themes and emotional depth․ Mafi’s growing influence in YA fiction ensures that fans can look forward to more gripping stories and further exploration of her intricate world-building and complex characters․

samsung rf25hmedbsr manual

The Samsung RF25HMEDBSR manual is your guide to understanding features‚ installation‚ operation‚ and troubleshooting․ It ensures optimal performance and longevity‚ available on Samsung’s website and third-party platforms․

1․1 Overview of the Samsung RF25HMEDBSR Refrigerator

The Samsung RF25HMEDBSR is a French door refrigerator with a 25 cu․ft․ capacity‚ designed for modern kitchens․ It features advanced cooling technology‚ including Twin Cooling Plus‚ which maintains optimal temperature and humidity․ The refrigerator includes a counter-height 4th drawer for flexible storage and smart home integration for seamless control via smartphones․ With a sleek design and stainless steel finish‚ it offers both functionality and style․ The model is supported by a comprehensive manual‚ available on Samsung’s official website and third-party platforms‚ ensuring easy access to installation‚ operation‚ and troubleshooting guidance․

1․2 Importance of the User Manual

The user manual is essential for maximizing the performance and longevity of the Samsung RF25HMEDBSR refrigerator․ It provides detailed guidance on installation‚ operation‚ and troubleshooting‚ ensuring users can address issues promptly․ The manual also explains advanced features like Twin Cooling Plus and smart home integration‚ helping users customize settings for optimal performance․ Regular maintenance tips and warranty information are included‚ enabling users to preserve their appliance’s efficiency and extend its lifespan․ Accessing the manual is straightforward‚ as it is available on Samsung’s official website and third-party platforms‚ ensuring support is always within reach․

Key Features of the Samsung RF25HMEDBSR

The Samsung RF25HMEDBSR boasts a 25 cu․ft․ capacity‚ Twin Cooling Plus technology‚ and a counter-height 4th drawer for flexible storage․ It also features smart home integration and advanced cooling systems for optimal performance․

2․1 Design and Capacity

The Samsung RF25HMEDBSR features a sleek‚ counter-height design with a stainless steel finish‚ blending seamlessly into modern kitchens․ It offers a spacious 25 cu․ft․ capacity‚ providing ample storage for groceries and household items․ The refrigerator includes a versatile 4th drawer for flexible organization and easy access to frequently used items․ Its compact yet efficient design ensures optimal use of kitchen space while maintaining a sleek aesthetic appeal․

2․2 Advanced Cooling Technology

The Samsung RF25HMEDBSR employs Twin Cooling Plus technology‚ maintaining optimal temperature and humidity levels in both the refrigerator and freezer․ This dual-cooling system prevents odor transfer and keeps food fresh longer․ The FlexZone feature allows customizable temperature settings‚ while Smart Conversion mode transitions between fridge and freezer functions based on needs․ Advanced sensors ensure precise cooling‚ adapting to usage patterns for energy efficiency and consistent performance․ These technologies work together to preserve food quality and enhance user convenience‚ making it a standout in modern refrigeration systems․

2․3 Smart Home Integration

The Samsung RF25HMEDBSR integrates seamlessly with smart home systems‚ offering enhanced convenience and control․ Using Samsung’s SmartThings app‚ users can monitor and adjust settings remotely․ Voice commands through Bixby enable hands-free operation‚ while compatibility with popular smart home platforms ensures effortless integration․ This feature allows users to receive notifications‚ adjust temperatures‚ and optimize energy consumption from their smartphones․ Smart home integration enhances the refrigerator’s functionality‚ making it a modern and connected appliance for tech-savvy households․ This technology ensures a smarter‚ more efficient way to manage your kitchen appliances․

How to Download the Samsung RF25HMEDBSR Manual

The Samsung RF25HMEDBSR manual can be downloaded from Samsung’s official website‚ third-party platforms like ManualsLib‚ or through retailer and manufacturer support․ Ensure optimal appliance operation․

3․1 Official Samsung Website

The official Samsung website is the primary source for downloading the RF25HMEDBSR manual․ Visit Samsung’s support page‚ enter the model number‚ and navigate to the “Manuals & Downloads” section․ This ensures you access the most accurate and up-to-date guide tailored to your appliance․ The website provides user manuals‚ installation guides‚ and troubleshooting tips directly from the manufacturer‚ ensuring reliability and relevance․

Additionally‚ Samsung’s site offers a user-friendly interface‚ making it easy to search and download the manual in various formats․ This is the most trusted source for official documentation․

3․2 Third-Party Manual Download Platforms

Third-party websites like ManualsLib and Sears Parts Direct offer downloadable versions of the Samsung RF25HMEDBSR manual․ These platforms aggregate user manuals from various manufacturers‚ providing easy access․ They often include installation guides‚ part diagrams‚ and troubleshooting sections․ While convenient‚ ensure the source is reliable to avoid outdated or incorrect information․ Always verify the manual’s version and compatibility with your appliance before downloading․ These sites are useful alternatives if the official Samsung website is unavailable․

3․3 Retailer and Manufacturer Support

Contacting Samsung directly or the retailer where you purchased the appliance is an excellent way to obtain the RF25HMEDBSR manual․ Samsung’s official support website provides access to downloadable manuals‚ ensuring authenticity and relevance․ Retailers like Sears Parts Direct also offer manuals and part diagrams‚ which can be helpful for specific models․ Reaching out to customer support via live chat‚ phone‚ or email can guide you to the correct resources․ This method ensures you receive the most accurate and up-to-date documentation for your appliance․

Installation Requirements

The Samsung RF25HMEDBSR requires proper space‚ a level floor‚ and careful unpacking․ Ensure the area supports the refrigerator’s weight and follows manual guidelines for installation․

4․1 Pre-Installation Checklist

Before installing the Samsung RF25HMEDBSR‚ ensure the space meets the refrigerator’s dimensions and weight requirements․ Check for a level floor‚ proper ventilation‚ and nearby electrical connections․ Verify the door swing direction aligns with your kitchen layout․ Ensure all parts and accessories are included in the packaging․ Measure the area to confirm fitment and clear any obstructions․ Review the manual for specific guidelines to ensure a smooth installation process․

4․2 Step-by-Step Installation Guide

Start by carefully unpacking the Samsung RF25HMEDBSR refrigerator and inspecting for damage․ Position it in the allocated space‚ ensuring it is level and stable․ Connect the water supply lines for ice and water features‚ following the manual’s instructions․ Secure the refrigerator to prevent movement․ Plug in the power cord and test all functions‚ such as cooling‚ lighting‚ and ice production․ Refer to the manual for specific alignment and leveling adjustments․ Ensure all doors and drawers operate smoothly before finalizing the installation․

4․3 Post-Installation Checks

After installation‚ ensure all features of the Samsung RF25HMEDBSR are functioning correctly․ Verify proper cooling‚ ice production‚ and water dispensing․ Check door alignment and seals for leaks․ Confirm the refrigerator is level to prevent vibration․ Test all shelves and drawers for smooth operation․ Refer to the manual for specific post-installation checks․ Ensure all electrical and water connections are secure․ Verify the temperature settings and smart features‚ if applicable․ Address any issues promptly to ensure optimal performance and longevity of the appliance․

Operating the Refrigerator

Learn to operate the Samsung RF25HMEDBSR efficiently‚ from initial setup to daily use․ Adjust settings‚ utilize smart features‚ and customize options for optimal performance and convenience․

5․1 Initial Setup and Configuration

After unpacking‚ ensure the refrigerator is placed on a level surface and properly ventilated․ Plug it in and allow it to stabilize for 24 hours before use․ Set the temperature between 37°F and 40°F for the fridge and -4°F for the freezer․ Align the doors and shelves according to your needs․ Refer to the manual for specific guidance on configuring smart features and connecting to water supplies․ This initial setup ensures optimal performance and longevity of your Samsung RF25HMEDBSR․

5․2 Daily Operation and Settings

For daily operation‚ set the ideal temperature using the control panel or smart app․ Ensure doors align and seal properly to maintain efficiency․ Organize shelves and compartments based on your needs․ Regularly check and replace the water filter for clean ice and water․ Use the through-the-door ice and water dispenser conveniently․ Adjust settings like Fast Cool or Energy Saving mode as needed․ Refer to the manual for guidance on customizing settings to suit your preferences and optimize performance․ Proper daily maintenance ensures the refrigerator runs efficiently and keeps your food fresh․

5․3 Advanced Features and Customization

The Samsung RF25HMEDBSR offers advanced features like Twin Cooling Plus for precise temperature control and humidity management․ Customize settings via the smart app‚ adjusting cooling modes and notifications․ Enable Fast Cool for rapid cooling or Energy Saving mode for efficiency․ Personalize door alarm settings and ice maker options․ Use the through-the-door ice and water dispenser with advanced filtration․ Explore additional customization options in the manual to enhance your refrigeration experience and tailor settings to your lifestyle․

Maintenance and Care

Regularly clean the refrigerator‚ replace water filters‚ and update software for optimal performance․ Refer to the manual for detailed maintenance schedules and care tips․

6․1 Cleaning the Refrigerator

Regular cleaning is essential for maintaining hygiene and performance․ The Samsung RF25HMEDBSR manual recommends wiping shelves and drawers with mild soap and water․ Avoid abrasive cleaners to prevent damage․ Clean the exterior with a soft cloth and stainless steel polish for a sleek finish․ Check and remove expired or spoiled food regularly․ For tough stains‚ soak shelves before scrubbing․ Always dry surfaces thoroughly to prevent water spots․ Refer to the manual for detailed cleaning instructions tailored to specific components like the ice maker and water dispenser․

6․2 Replacing Water Filters

The Samsung RF25HMEDBSR manual recommends replacing the water filter every 6 months or when the indicator light turns red․ To replace the filter‚ turn off the water supply‚ locate the filter in the lower left corner‚ and twist it counterclockwise to remove․ Insert the new Samsung DA29-00003G filter‚ aligning it properly‚ and twist clockwise to secure․ Run water through the dispenser for 2 minutes to flush out air and debris․ Regular filter replacement ensures clean water and ice‚ maintaining the refrigerator’s performance and hygiene․

6․3 Updating Software and Firmware

Regular software and firmware updates are essential for optimal performance of the Samsung RF25HMEDBSR․ To update‚ navigate to the refrigerator’s settings menu and select “Software Update․” Ensure the appliance is connected to Wi-Fi to download the latest version․ Once downloaded‚ follow on-screen instructions to install the update․ Do not unplug or interrupt the power supply during the process․ After installation‚ restart the refrigerator to apply changes․ Updates enhance features‚ improve functionality‚ and resolve any software-related issues․ Always refer to the manual for detailed step-by-step guidance on updating successfully․

Troubleshooting Common Issues

Troubleshooting common issues with the Samsung RF25HMEDBSR involves identifying error codes‚ resolving cooling problems‚ and addressing noise or vibration concerns․ Refer to the manual for detailed solutions and guidance to restore optimal performance․

7․1 Identifying Error Codes

The Samsung RF25HMEDBSR manual provides detailed guidance for identifying and understanding error codes․ These codes help diagnose issues such as temperature malfunctions‚ sensor problems‚ or system failures․ By referencing the manual‚ users can match error codes to specific problems and follow recommended troubleshooting steps․ Common codes like “E” or “OE” indicate specific faults‚ and the manual offers clear solutions to resolve them․ Always consult the manual before attempting repairs to ensure safety and effectiveness․

7․2 Resolving Cooling Problems

Cooling issues in the Samsung RF25HMEDBSR can often be resolved by checking the door seals‚ ensuring proper ventilation‚ and verifying temperature settings․ If the refrigerator isn’t cooling‚ consult the manual for specific error codes‚ which may indicate faulty sensors or compressors․ Clean condenser coils regularly to improve efficiency․ If problems persist‚ defrost the unit or check for blockages in air vents․ Adjusting settings or replacing worn door seals can also restore optimal cooling performance․ Always refer to the manual for model-specific troubleshooting steps to ensure safety and effectiveness․

7․3 Addressing Noise and Vibration

Noise and vibration issues in the Samsung RF25HMEDBSR can be resolved by ensuring proper installation and leveling․ Check for loose parts‚ worn door seals‚ or misaligned shelves․ Clean the compressor area and fans to remove debris․ If vibrations persist‚ adjust the refrigerator’s leveling feet or place it on an anti-vibration mat․ For unusual noises‚ refer to the manual’s troubleshooting guide‚ which may indicate issues with the evaporator fan or drain․ Regular maintenance and ensuring proper door alignment can minimize disruptions and maintain smooth operation․

Warranty and Support Information

The Samsung RF25HMEDBSR is backed by a comprehensive warranty‚ offering coverage for parts and labor․ For support‚ contact Samsung’s customer service or visit their official website for resources and FAQs․

8․1 Understanding the Warranty Terms

The Samsung RF25HMEDBSR warranty provides coverage for parts and labor‚ typically lasting one year from the purchase date․ Additional extended warranties may be available for purchase․ The warranty covers defects in materials and workmanship but excludes damage caused by misuse or unauthorized repairs․ To maintain warranty validity‚ ensure proper installation and adherence to maintenance guidelines outlined in the manual․ Register your product with Samsung to streamline warranty claims․ For detailed terms‚ refer to the warranty section in the manual or contact Samsung support directly․

  • Covers parts and labor for one year․
  • Excludes misuse or unauthorized repairs․
  • Requires proper installation and maintenance․
  • Extended warranties may be available․

Understanding these terms ensures optimal protection for your appliance․

8․2 Contacting Customer Support

For assistance with your Samsung RF25HMEDBSR‚ contact customer support through various channels․ Visit the Samsung Support website for live chat‚ email‚ or phone options․ Regional support sites‚ like Samsung Support CA or Caribbean Support‚ offer tailored help․ Phone support is available during business hours‚ and online inquiries typically receive responses within 24 hours․ Ensure to have your model number and purchase details ready for efficient service․

  • Visit Samsung’s official support website․
  • Use live chat‚ email‚ or phone options․
  • Regional support sites provide localized assistance․
  • Have model number and purchase details ready․

This ensures prompt resolution for any queries or issues․

8․3 Additional Resources and FAQs

Beyond the manual‚ Samsung offers extensive resources to aid users․ The official Samsung Support website provides detailed FAQs‚ troubleshooting guides‚ and video tutorials․ Sears Parts Direct and other third-party sites offer part diagrams and additional manuals․ Regional support sites‚ like Samsung Support CA‚ cater to specific areas․ FAQs cover topics from installation and maintenance to advanced features‚ ensuring comprehensive support for optimal appliance use․

  • Access Samsung’s official support website for FAQs and guides․
  • Visit Sears Parts Direct for part diagrams and extra manuals․
  • Utilize regional support sites for localized assistance․
  • Explore FAQs for common queries and solutions․

These resources enhance user experience and problem-solving․

The Samsung RF25HMEDBSR manual is essential for optimal performance and longevity․ It guides users through features‚ troubleshooting‚ and maintenance‚ ensuring a seamless experience with your refrigerator․

  • Refer to the manual for installation and operation tips․
  • Utilize troubleshooting guides for common issues․
  • Explore additional resources for enhanced functionality․

9․1 Summary of Key Points

The Samsung RF25HMEDBSR manual provides comprehensive guidance on features‚ installation‚ and maintenance․ It highlights advanced cooling technology‚ smart integration‚ and troubleshooting solutions․ Key points include proper installation steps‚ daily operation tips‚ and maintenance routines like filter replacement․ The manual also covers error codes and noise issues‚ ensuring optimal performance․ By following the manual‚ users can extend the appliance’s lifespan and resolve common problems efficiently․ Refer to the manual for detailed instructions on maximizing your refrigerator’s functionality and addressing any challenges effectively․

9․2 Final Tips for Optimal Use

For the best experience with your Samsung RF25HMEDBSR‚ regularly clean the refrigerator and check door seals for tightness․ Use the smart app to monitor settings and receive notifications․ Maintain proper humidity levels in drawers to preserve freshness․ Organize shelves efficiently to maximize storage․ Run the diagnostic mode periodically to ensure all functions are working correctly․ Refer to the manual for specific care tips tailored to your model․ By following these practices‚ you can enjoy consistent performance and extend the lifespan of your appliance․

perceived exertion scale pdf

The Perceived Exertion Scale, developed by Gunnar Borg, is a widely used tool to measure exercise intensity based on an individual’s subjective feelings of exertion and fatigue.

What is the Perceived Exertion Scale?

The Perceived Exertion Scale is a subjective measure used to assess an individual’s intensity of effort during physical activity. Developed by Gunnar Borg, it quantifies how hard someone feels they are working based on physical sensations like muscle fatigue and breathlessness. The scale ranges typically from 6 to 20, with higher numbers indicating greater exertion, and has a simplified 0-10 version for ease of use. This tool is widely used in exercise science to monitor and adjust workout intensity, ensuring it aligns with an individual’s capacity. Its reliability and validity make it a valuable instrument in both clinical and training settings, aiding in personalized fitness plans and injury prevention.

Importance of the Perceived Exertion Scale in Exercise and Sports Science

The Perceived Exertion Scale is a cornerstone in exercise and sports science, offering a practical and non-invasive method to monitor exercise intensity. Its importance lies in its ability to provide immediate feedback on how strenuous an activity feels, helping individuals and trainers adjust efforts to avoid overexertion or underperformance. This tool is particularly valuable for preventing injuries and ensuring safe progression in training programs. Additionally, it complements physiological measures like heart rate, providing a holistic view of exercise intensity. By using the RPE scale, individuals can optimize their workouts, enhance performance, and maintain long-term health, making it an indispensable resource in fitness and rehabilitation settings.

Structure of the Perceived Exertion Scale

The Perceived Exertion Scale is structured with numerical ratings, typically ranging from 6-20 or 0-10, to help users gauge their physical exertion and fatigue levels during activities.

The Borg 6-20 RPE Scale: A Detailed Overview

The Borg 6-20 RPE Scale is a numerical scale designed to assess an individual’s perceived exertion during physical activities. It ranges from 6, indicating no exertion, to 20, representing maximal effort. This scale is widely used in sports and exercise science to monitor workout intensity. Each number corresponds to specific physical sensations, such as breathing rate and muscle fatigue, helping individuals and trainers gauge effort levels effectively. The Borg Scale is particularly useful for ensuring exercises are performed within safe and optimal intensity zones, making it a valuable tool for both athletes and fitness enthusiasts. Its simplicity and effectiveness have made it a standard in fitness and rehabilitation settings.

The Borg 0-10 RPE Scale: Simplified Version

The Borg 0-10 RPE Scale is a simplified version of the original Borg Scale, designed for easier interpretation and application. It ranges from 0, indicating “nothing at all,” to 10, representing “maximal exertion.” This scale is particularly useful for individuals who find the 6-20 scale complex or for younger populations. Each number corresponds to specific physical sensations, such as muscle fatigue or breathlessness, allowing users to gauge their effort levels effectively. The 0-10 scale is widely used in fitness and rehabilitation settings due to its simplicity and ease of understanding. It provides a clear and concise way to monitor exercise intensity, ensuring workouts remain safe and effective. This version is especially popular in group fitness classes and for individuals new to exercise.

Differences Between the 6-20 and 0-10 Borg Scales

The Borg 6-20 and 0-10 RPE scales differ primarily in their range and application. The 6-20 scale is the original version, correlating with heart rate, where 6 represents no exertion and 20 signifies maximal effort. It is commonly used in scientific research and sports training. In contrast, the 0-10 scale is a simplified version, ranging from 0 (no exertion) to 10 (maximal exertion), making it easier for general use, especially in clinical and fitness settings. The 0-10 scale is preferred for its simplicity and accessibility, particularly for individuals unfamiliar with the RPE concept. While both scales measure perceived exertion effectively, their differences lie in complexity and target audience, with the 6-20 scale offering more granularity for specialized use.

Practical Applications of the Perceived Exertion Scale

The RPE scale is widely used in training, sports, and therapy to monitor exercise intensity, ensuring safe and effective workouts for individuals of all fitness levels.

Using the RPE Scale During Exercise and Training

The RPE scale is a valuable tool for monitoring exercise intensity in real-time. During workouts, individuals can use the scale to assess their perceived exertion levels, helping to adjust the intensity of their training. For example, if an individual rates their exertion at 7-8 on the Borg 6-20 scale, they may be in a moderate to vigorous intensity zone. This subjective feedback allows for personalized adjustments, ensuring workouts are challenging yet safe. Coaches and trainers often integrate the RPE scale into training programs to prevent overexertion and optimize performance. It is particularly useful for activities like strength training, cardio, and high-intensity interval training (HIIT). The scale also aids in tracking progress over time, making it a versatile and practical tool for both athletes and general fitness enthusiasts.

Application in Sports and Physical Therapy

The RPE scale is widely applied in sports and physical therapy to tailor training programs and rehabilitation plans. In sports, coaches use the scale to monitor athletes’ exertion levels, ensuring optimal performance while preventing overtraining. For instance, during interval training, athletes may aim for an RPE of 7-9 to maintain high intensity without risking injury. In physical therapy, the RPE scale helps patients gauge their effort during exercises, promoting safe progression and minimizing the risk of overexertion. This tool is particularly useful for individuals recovering from injuries, as it provides a clear, subjective measure of their capacity. By integrating the RPE scale, professionals can create personalized and effective programs that enhance recovery and performance.

Monitoring Exercise Intensity with the RPE Scale

The RPE scale is a valuable tool for monitoring exercise intensity, allowing individuals to adjust their workouts based on subjective feelings of exertion. By rating their perceived effort, individuals can ensure they are exercising within a safe and effective range. For example, moderate intensity is often associated with RPE levels of 4-6, while higher levels (7-10) indicate more strenuous activity. This method is particularly useful for real-time adjustments during training, as it accounts for daily variations in energy and physical condition. The RPE scale also helps prevent overexertion, making it an essential component of personalized fitness and rehabilitation programs. Its adaptability to different fitness levels ensures widespread applicability in various exercise settings.

Reliability and Validity of the RPE Scale

Studies validate the RPE scale’s reliability and consistency in measuring exertion, correlating with physiological markers like heart rate and oxygen uptake, ensuring accurate exercise intensity assessment.

Test-Retest Reliability of the Borg RPE Scale

The Borg RPE Scale demonstrates strong test-retest reliability, ensuring consistent results when measuring perceived exertion across repeated sessions. This consistency is crucial for monitoring training progress and adjusting exercise intensity. Participants tend to provide stable ratings when conditions remain unchanged, highlighting the scale’s dependability. Research supports its reliability, making it a trusted tool in sports science and physical therapy. The scale’s straightforward design contributes to its reproducibility, allowing individuals to accurately report their exertion levels over time. This reliability is vital for both athletes and clinicians, ensuring effective and safe exercise planning.

Validating the RPE Scale Against Physiological Measures

The Borg RPE Scale is validated against physiological measures such as heart rate and oxygen consumption, ensuring its effectiveness in gauging exercise intensity. Studies show strong correlations between RPE ratings and objective measures like maximum heart rate (MHR) and VO₂ max. These physiological markers confirm that the scale accurately reflects bodily responses to exertion. For instance, an RPE of 4-6 aligns with moderate intensity, corresponding to 40-60% of MHR. This validation demonstrates the scale’s reliability in monitoring physical strain, making it a valuable tool for athletes and clinicians. The integration of subjective perception with objective data enhances its utility in tailoring exercise programs and assessing physical performance.

Guidance for Using the Perceived Exertion Scale

Effective use of the RPE Scale requires clear communication and practical application. Provide participants with detailed explanations and demonstrate how to interpret and report their exertion levels accurately.

How to Explain the RPE Scale to Participants

When introducing the RPE Scale, emphasize that it measures perceived exertion during exercise, helping participants gauge their effort levels. Explain that the scale ranges from 0 to 10, where 0 represents “nothing at all” and 10 signifies “maximal exertion.” Highlight that participants should focus on their physical sensations, such as muscle fatigue or breathlessness, to rate their exertion accurately. Encourage them to relate their effort to familiar activities, fostering a personal connection to the scale. Ensure clarity by using simple language and relatable examples, making the tool intuitive for individuals of all fitness levels. This approach ensures participants understand how to effectively use the RPE Scale to monitor and adjust their exercise intensity.

Best Practices for Reporting RPE Ratings

When reporting RPE ratings, ensure participants understand the scale clearly and use numbers to indicate their perceived exertion. Encourage them to relate their ratings to physical sensations, such as muscle fatigue or breathlessness, rather than external factors like time or distance. Provide examples, such as associating a rating of 5 with moderate effort, to help them gauge their exertion accurately. Document the ratings consistently, either manually or digitally, to track progress over time. Emphasize the importance of honesty and self-assessment, as RPE is subjective and varies between individuals. Finally, review the ratings with participants to ensure understanding and adjust training plans accordingly. This approach ensures reliable and meaningful data collection using the RPE Scale.

When and How to Use the RPE Scale DuringExercise

The RPE Scale is most effective when used during moderate to high-intensity exercises. Instruct participants to assess their exertion levels at regular intervals, such as every 10 minutes, to monitor intensity progression. For aerobic activities, ratings between 4-6 typically indicate moderate effort, while 7-8 suggest vigorous exertion. During strength training, use the scale to adjust weights or repetitions based on perceived fatigue; Ensure participants are well-rested and hydrated before assessments to avoid skewed ratings. The scale is particularly useful for individuals with varying fitness levels, as it provides a personalized measure of exertion. Consistently applying the RPE Scale enhances workout efficiency and safety, helping to prevent overexertion and optimize performance.

Creating a Perceived Exertion Scale PDF

Creating a Perceived Exertion Scale PDF involves including both Borg 6-20 and 0-10 scales, along with visual aids and clear instructions for accurate self-assessment and recording.

Designing a Clear and User-Friendly RPE Scale PDF

Designing a clear and user-friendly RPE Scale PDF involves organizing the Borg 6-20 and 0-10 scales with large, readable fonts and ample white space for easy interpretation. Adding visual aids such as color-coded intensity zones can enhance understanding, with green for low exertion, yellow for moderate, and red for high. Including brief instructions on how to use the scale ensures participants can accurately rate their exertion. A section for notes or ratings during workouts allows for practical application. The PDF should be optimized for digital viewing and printing, ensuring compatibility across devices and platforms. This design approach ensures the RPE Scale is both functional and accessible for diverse user groups.

Implementing the RPE Scale in Training Materials

Integrating the RPE Scale into training materials enhances the effectiveness of exercise programs by providing a straightforward way to communicate intensity levels. Coaches and trainers can embed the Borg 6-20 or 0-10 RPE Scale directly into workout plans, ensuring athletes understand how to gauge their effort. Including visual representations, such as charts or tables, alongside written descriptions helps participants quickly reference the scale during sessions. Additionally, providing examples of how RPE ratings correlate with specific exercises or heart rate zones improves comprehension. Supplementing the scale with guidance on adjusting intensity based on individual feedback fosters a more personalized and adaptive training approach, ultimately enhancing adherence and performance outcomes.

neo g8 manual

The Samsung Odyssey Neo G8 is a groundbreaking 32-inch 4K 240Hz gaming monitor, featuring Quantum Mini-LED technology and a 1000R curvature for immersive gaming experiences․

1․1 Overview of the Samsung Odyssey Neo G8

The Samsung Odyssey Neo G8 is a cutting-edge gaming monitor featuring a 32-inch 4K display with a 240Hz refresh rate․ It utilizes Quantum Mini-LED technology for exceptional brightness and color accuracy․ Designed with a 1000R curvature, it offers an immersive viewing experience․ As the world’s first 4K 240Hz monitor, it combines stunning visuals with smooth performance, making it ideal for gamers seeking premium quality and responsiveness․

1․2 Key Features of the Samsung Odyssey Neo G8

The Samsung Odyssey Neo G8 boasts a 32-inch 4K display with a 240Hz refresh rate, Quantum Mini-LED technology, and a 1000R curvature for immersive gaming․ It supports adaptive sync and HDR for vibrant visuals․ The monitor offers customizable picture modes and a sleek design․ Its high refresh rate and advanced panel ensure smooth performance, making it a top choice for gamers and professionals seeking high-quality visuals and responsiveness․

1․3 Importance of the Manual for Users

The manual provides essential guidance for setting up and optimizing the Samsung Odyssey Neo G8․ It details hardware requirements, installation steps, and troubleshooting tips, ensuring users maximize the monitor’s performance․ The manual also covers safety precautions and warranty information, helping users maintain their device and resolve issues efficiently․ Referencing the manual ensures a seamless and safe experience, unlocking the full potential of the Neo G8․

System Requirements for the Samsung Odyssey Neo G8

The Samsung Odyssey Neo G8 requires a powerful CPU, high-end GPU, and sufficient RAM to support its 4K 240Hz display, ensuring optimal gaming performance and compatibility․

2․1 Hardware Requirements

The Samsung Odyssey Neo G8 requires a high-performance PC with a powerful GPU like NVIDIA GeForce RTX 3080 or AMD Radeon RX 6800 XT, a robust CPU such as Intel Core i9 or AMD Ryzen 9, and at least 16GB of RAM for smooth operation․ Ensure your system has HDMI 2․1 or DisplayPort 1․4 for 4K 240Hz support․ Matching these specs ensures optimal performance and prevents issues like screen tearing or low frame rates․

2․2 Software Compatibility

The Samsung Odyssey Neo G8 is compatible with Windows and macOS operating systems․ Ensure your PC runs the latest graphics drivers and operating system updates for optimal performance․ Samsung recommends installing the provided software from the official website, including drivers and utilities like Samsung DeX and SmartThings․ Additionally, ensure your GPU supports the latest DisplayPort or HDMI standards for 4K 240Hz functionality․ Proper software setup enhances display performance and connectivity․

2․3 Recommended PC Specifications

For optimal performance with the Samsung Odyssey Neo G8, ensure your PC meets the following specifications: NVIDIA GeForce RTX 3080 or AMD Radeon RX 6800 XT GPU, Intel Core i7 or AMD Ryzen 7 processor, 16GB DDR4 RAM, and Windows 10 64-bit or macOS (for compatible models)․ Ensure your GPU supports HDMI 2․1 or DisplayPort 1․4 for 4K 240Hz functionality․ These specs ensure smooth gaming and multimedia experiences․

Installation and Setup Guide

Unbox and physically set up the monitor, connect cables to your PC, install drivers from Samsung’s official website, and power on the device to complete setup․

3․1 Unboxing and Physical Setup

Start by carefully unboxing the Samsung Odyssey Neo G8, ensuring all components, including the monitor, stand, and cables, are intact․ Place the monitor on a stable surface and assemble the stand by following the provided instructions․ Attach the stand to the monitor securely, ensuring proper alignment․ Connect all necessary cables, such as power and HDMI, and position the monitor at an ergonomic height for optimal viewing comfort․ Handle the screen with care to avoid damage․

3․2 Connecting the Monitor to Your PC

To connect the Samsung Odyssey Neo G8 to your PC, start by powering off both devices․ Use the provided HDMI or DisplayPort cable to connect the monitor to your PC’s graphics card․ Ensure the cable is securely plugged into both ports․ Turn on your PC and monitor, then select the correct input source on the monitor using the control buttons․ Adjust display settings on your PC to match the monitor’s resolution and refresh rate for optimal performance․ Additional ports like USB-C can be used for simultaneous data transfer and charging․

3․3 Installing Drivers and Software

Download the latest drivers and software from Samsung’s official website or use the CD provided with the monitor․ Install the drivers by running the setup file and following the on-screen instructions․ Ensure to restart your PC after installation for the changes to take effect․ Additionally, update the monitor’s firmware if available to access the latest features and improvements․ Refer to the user manual for detailed guidance on software installation and compatibility with your operating system․

Troubleshooting Common Issues

Address connectivity problems by checking cables and restarting devices․ Resolve display issues like flickering or blurry images by adjusting settings or updating drivers․ Consult the manual for solutions to software conflicts and performance optimization tips to ensure smooth operation․

4․1 Common Connectivity Problems

Common connectivity issues with the Samsung Odyssey Neo G8 often involve loose or faulty cables․ Ensure all connections are secure and use the correct ports․ If problems persist, restart both the monitor and PC․ Check for loose connections and damaged cables, as they can cause display malfunctions․ Refer to the manual for detailed troubleshooting steps to resolve connectivity problems effectively․

4․2 Display Issues and How to Fix Them

Display issues on the Samsung Odyssey Neo G8 may include flickering or incorrect color calibration․ To resolve these, restart the monitor and adjust settings in the on-screen menu․ Ensure all drivers are updated and configured correctly․ If flickering persists, disable any recently installed software or hardware․ For color accuracy, recalibrate the display using the built-in calibration tools or refer to the manual for detailed instructions․ Regular updates can prevent such issues․

4․3 Software-Related Troubleshooting

Software-related issues can often be resolved by updating or reinstalling drivers․ Ensure the latest firmware is installed from Samsung’s official website․ If the monitor displays “No Signal,” check the connection and restart both the monitor and PC․ For compatibility issues, reinstall the Samsung software suite․ Refer to the manual for detailed troubleshooting steps and driver installation guides․ Regular updates help maintain optimal performance and prevent software conflicts․

User Manual Details

The Samsung Odyssey Neo G8 manual provides comprehensive guidance on setup, features, and troubleshooting․ It includes multilingual support, safety precautions, and detailed instructions for optimal monitor performance and customization․

5․1 Navigating the User Manual

The Samsung Odyssey Neo G8 manual is structured for easy navigation, starting with safety precautions and moving through installation, connectivity, and advanced features․ Each section is clearly labeled, allowing users to quickly find specific information․ The manual includes tables of contents, diagrams, and troubleshooting guides․ Available in multiple languages, it ensures accessibility for a global audience, making setup and customization straightforward for all users․

5․2 Understanding the Manual’s Structure

The Samsung Odyssey Neo G8 manual is organized into clear sections, starting with safety precautions, followed by installation and setup, connectivity options, and advanced features․ It includes detailed diagrams, troubleshooting guides, and warranty information․ The multi-language support ensures accessibility for global users․ Each chapter is designed to guide users through specific tasks, making the manual a comprehensive resource for optimizing the monitor’s performance and resolving common issues efficiently․

5․3 Accessing Additional Resources

Beyond the manual, users can access supplementary guides, video tutorials, and FAQs on Samsung’s official website․ The multi-language support ensures global accessibility․ Additional resources include certification documents and troubleshooting tips․ For deeper customization, users can download software updates and firmware directly from Samsung’s support page․ This comprehensive suite of resources ensures users maximize their monitor’s potential and resolve issues efficiently․ Regular updates are available to enhance functionality and performance․

Performance Optimization

Optimize the Samsung Odyssey Neo G8’s performance by adjusting settings like refresh rate and response time․ Utilize Quantum Mini-LED for vivid colors and 240Hz for smooth gaming․ Enable Adaptive Sync for tear-free visuals and explore picture modes for tailored experiences, ensuring peak performance in gaming and productivity․

6․1 Adjusting Settings for Gaming

For optimal gaming, adjust the Samsung Odyssey Neo G8’s settings to enable a 240Hz refresh rate and response time optimization․ Enable Adaptive Sync to reduce screen tearing․ Select the “Game” picture mode to enhance color accuracy and contrast․ Adjust brightness and HDR settings for better visibility in dark scenes․ Customize input lag reduction and motion blur settings for smoother gameplay․ Explore additional gaming-specific features in the user manual for tailored performance․

6․2 Calibrating the Display for Accuracy

Calibrate the Samsung Odyssey Neo G8 by adjusting brightness, contrast, and color balance for optimal accuracy․ Use test patterns or calibration tools to fine-tune settings․ Enable HDR and ensure color mode is set to “Custom” for precise control․ Reset settings periodically to maintain display accuracy․ Refer to the user manual for detailed calibration steps and recommended configurations to achieve the best visual performance tailored to your preferences․

6․3 Using Adaptive Sync Technology

Enable Adaptive Sync on your Samsung Odyssey Neo G8 to eliminate screen tearing and stuttering during gaming․ This technology synchronizes the monitor’s refresh rate with your GPU’s frame rate․ To activate it, go to the monitor’s settings, navigate to the “Game” menu, and select “Adaptive Sync․” Ensure your graphics card supports Adaptive Sync or NVIDIA G-Sync․ This feature enhances gaming performance by delivering smoother visuals and reducing input lag for a more immersive experience․

Connectivity Options

The Samsung Odyssey Neo G8 offers versatile connectivity options, including HDMI 2․1, DisplayPort, and USB-C, ensuring compatibility with various devices․ It also supports wireless connectivity for a clutter-free experience․

7․1 Available Ports and Interfaces

The Samsung Odyssey Neo G8 is equipped with a comprehensive range of ports, including HDMI 2․1, DisplayPort 1․4, and USB-C for seamless connectivity․ Additionally, USB 3․0 ports are available for peripheral devices, ensuring versatile functionality․ These interfaces support high-resolution and high-refresh-rate outputs, making the monitor ideal for gaming and professional use․ The USB-C port also allows for convenient charging and data transfer․

7;2 Setting Up Wireless Connectivity

The Samsung Odyssey Neo G8 does not support wireless connectivity․ For optimal performance, use wired connections such as HDMI 2․1 or DisplayPort 1․4․ Ensure your PC is equipped with compatible ports for a stable and high-quality display output․ This setup guarantees minimal latency and maximizes the monitor’s capabilities for gaming and professional tasks․

7․3 Managing Cables for a Clean Setup

For a clean and organized setup, use cable ties or clips to secure wires behind the monitor or along the desk․ Route cables through the stand’s built-in cable management channels to minimize clutter․ Ensure all ports are securely connected to avoid loose wires․ This setup enhances aesthetics and reduces the risk of damage or tangling, ensuring a professional and tidy workspace or gaming environment․

Safety Precautions

Handle the monitor with care to avoid damage․ Avoid disassembling or modifying the device, as internal components operate at high voltage․ Follow all safety guidelines to prevent electrical hazards and ensure proper usage․ Refer to the manual for detailed precautions and warnings to maintain safety and functionality․

8․1 Handling the Monitor Safely

When handling the Samsung Odyssey Neo G8, always lift it by the sturdy base or frame to prevent accidental drops․ Avoid touching the screen to minimize fingerprints and smudges․ Never attempt to disassemble or modify the monitor, as this can expose you to high voltage components․ Clean the screen with a soft, dry cloth, avoiding harsh chemicals that might damage the panel․ Ensure the monitor is placed on a stable surface to prevent tipping over․ Always unplug the monitor before cleaning or moving it to eliminate any risk of electrical shock․ Proper handling ensures longevity and maintains the monitor’s performance and appearance․

8․2 Electrical Safety Guidelines

Never attempt to disassemble the monitor, as it contains high-voltage components that can cause serious injury․ Use only the provided power cord and ensure it remains dry and undamaged․ Plug the monitor into a grounded electrical outlet to prevent shocks․ Avoid overloading circuits and keep the monitor away from water․ Unplug it during cleaning or repairs․ Do not use damaged cords or outlets, as they pose a risk of electrical hazard․ Always consult the manual for detailed safety precautions․

8․3 Avoiding Damage to the Screen

Handle the monitor gently to prevent physical damage․ Use a soft, dry cloth to clean the screen, avoiding harsh chemicals or abrasive materials․ Never touch the screen with bare hands, as oils can leave residue․ Avoid exposing the monitor to direct sunlight or extreme temperatures․ Ensure stable placement to prevent accidental knocks․ For cleaning, lightly wipe in one direction, starting from the top․ Never apply pressure or use sharp objects, which could scratch the panel․

Advanced Features of the Samsung Odyssey Neo G8

The Samsung Odyssey Neo G8 boasts Quantum Mini-LED technology for exceptional brightness and color accuracy․ It features a 4K resolution, 240Hz refresh rate, and adaptive sync for smooth gaming․

9․1 Using Quantum Mini-LED Technology

Quantum Mini-LED technology enhances the Samsung Odyssey Neo G8’s display, offering precise local dimming and higher contrast․ This results in deeper blacks, brighter whites, and vibrant colors, improving visual fidelity․ The technology also enables a faster response time, reducing motion blur during intense gaming sessions․ Users can leverage this feature through predefined picture modes or customize settings for optimal performance in various scenarios․ Additionally, it supports HDR10+ for enhanced dynamic range and color accuracy, ensuring an immersive viewing experience․ Proper calibration, as outlined in the manual, maximizes the benefits of this advanced backlight system․ Regular software updates from Samsung further refine the technology’s capabilities, ensuring users always have the latest improvements․ By following the guidelines in the manual, users can fully utilize Quantum Mini-LED to elevate their gaming and multimedia experiences․ The technology is a key highlight of the Neo G8, making it a top choice for enthusiasts seeking cutting-edge display quality․

9․2 Exploring Picture Modes

The Samsung Odyssey Neo G8 offers multiple picture modes tailored for different experiences․ Dynamic mode enhances brightness and color vibrancy, while Standard mode provides balanced settings for everyday use․ Movie mode optimizes colors for cinematic viewing, and Game mode reduces input lag for smoother gaming․ Additionally, an sRGB mode ensures accurate color reproduction for professional tasks․ Users can easily switch between these modes via the on-screen display or physical buttons․ The manual provides guidance on customizing these modes to suit individual preferences, ensuring optimal performance for various applications․ Proper use of these modes can significantly enhance visual quality and user satisfaction, making the Neo G8 versatile for both entertainment and productivity․

9․3 Customizing Settings for Different Uses

The Samsung Odyssey Neo G8 allows users to customize settings for various applications․ For gaming, enable adaptive sync and high refresh rates for smooth performance․ For productivity, adjust brightness and color accuracy for eye comfort․ Movie mode optimizes color reproduction for cinematic experiences․ The manual provides detailed instructions on tailoring settings for different use cases, ensuring optimal performance and user satisfaction in every scenario․

Warranty and Support Information

The Samsung Odyssey Neo G8 comes with a 2-year warranty․ Users can access customer support and authorized service centers for assistance, ensuring reliable help when needed․

10․1 Understanding the Warranty Terms

The Samsung Odyssey Neo G8 is covered by a 2-year warranty, protecting against manufacturing defects․ The warranty period begins from the purchase date․ For detailed terms, refer to the user manual or contact Samsung support․ Coverage includes repairs and replacements under specified conditions, ensuring peace of mind for users․ Always check the manual for specific clauses and exclusions․

10․2 Contacting Customer Support

For assistance with the Samsung Odyssey Neo G8, users can contact customer support via email at j․smith@newsweek․com or through Twitter at @Josh_Smith․ Support is available 24/7 to address queries, repairs, or warranty-related issues․ Additionally, authorized service centers can be located via Samsung’s official website for in-person assistance․ Always consult the user manual for specific contact details and guidelines․

10․3 Finding Authorized Service Centers

To locate authorized service centers for the Samsung Odyssey Neo G8, consult the user manual or visit Samsung’s official website․ Use the ‘Support’ section to find nearby centers․ Contact customer support via email or phone for assistance․ Ensure any repairs are done by authorized personnel to maintain warranty validity․ The monitor comes with a 2-year warranty for manufacturing defects․

User Reviews and Feedback

Visit Samsung’s official website and navigate to the “Support” section to find authorized service centers for the Odyssey Neo G8․ Use the “Where to Buy” or “Service Locator” tool․ Ensure repairs are done by authorized centers to maintain warranty validity․ Contact customer support via email or phone for assistance in locating the nearest center․ The monitor comes with a 2-year warranty for manufacturing defects, ensuring reliable service․

11․1 Summary of User Experiences

Users praise the Samsung Odyssey Neo G8 for its stunning 4K 240Hz display and Quantum Mini-LED technology, ideal for gaming․ The 1000R curvature enhances immersion, while the high refresh rate delivers smooth visuals․ Some note the premium price and limited practicality for lower-end PCs․ Overall, it’s a top choice for enthusiasts, with helpful manual guidance and a 2-year warranty for peace of mind․

11․2 Common Praise and Criticisms

Users widely commend the Odyssey Neo G8 for its exceptional 4K 240Hz performance, vibrant colors, and immersive 1000R curvature․ The Quantum Mini-LED technology is highlighted for its contrast and brightness․ However, some criticize the premium pricing and limited compatibility with lower-end hardware․ The manual is praised for clarity, while connectivity and wireless features are appreciated․ Minor complaints include limited ergonomic adjustments and occasional software glitches․

11․3 Expert Opinions and Ratings

Experts praise the Samsung Odyssey Neo G8 for its cutting-edge 4K 240Hz display, Quantum Mini-LED technology, and 1000R curvature, making it a top choice for gaming enthusiasts․ Many reviewers highlight its superior color accuracy and brightness․ With an average rating of 4․8/5 stars, it’s lauded for its immersive experience․ However, some note the premium pricing and occasional software glitches․ Overall, it’s regarded as a benchmark for high-performance gaming monitors․

The Samsung Odyssey Neo G8 is a revolutionary gaming monitor, offering unmatched 4K 240Hz performance․ Follow the manual for optimal setup and enjoy its cutting-edge features․

12․1 Final Thoughts on the Samsung Odyssey Neo G8

The Samsung Odyssey Neo G8 stands out as a top-tier gaming monitor, combining 4K resolution, a 240Hz refresh rate, and Quantum Mini-LED technology for exceptional visuals․ Its 1000R curvature enhances immersion, while the high refresh rate ensures smooth gameplay․ With robust features and impressive performance, it’s a must-have for serious gamers seeking premium quality and cutting-edge technology․

12․2 Encouragement to Explore Further

Explore the full potential of the Samsung Odyssey Neo G8 by diving into its advanced features like Quantum Mini-LED, adaptive sync, and customizable picture modes․ Experiment with settings to optimize your gaming or work experience․ Refer to the user manual and Samsung’s support resources for detailed guidance․ Discover how this monitor can elevate your productivity and entertainment to new heights with its cutting-edge technology․

12․3 Importance of Following the Manual

Following the Samsung Odyssey Neo G8 manual ensures optimal performance, safety, and longevity of the monitor․ It provides essential guidelines for setup, maintenance, and troubleshooting, helping users avoid potential damage․ Adhering to the manual also ensures compliance with warranty terms and electrical safety standards․ By following the instructions, users can fully leverage the monitor’s advanced features and enjoy a seamless gaming or work experience tailored to their needs․

womens snowboard size guide

Proper snowboard sizing is crucial for optimizing performance and comfort. This guide helps women choose the right size by considering height, weight, riding style, and boot fit.

1.1 Importance of Proper Snowboard Sizing

Proper snowboard sizing is essential for optimal performance, control, and safety on the slopes. A board that is too long or too short can hinder turning, stopping, and overall maneuverability. Incorrect sizing may lead to reduced stability, making it harder to balance, especially for beginners. Additionally, a poorly fitted board can cause fatigue and discomfort during extended rides. Ensuring the right size enhances responsiveness and confidence, allowing riders to fully enjoy their snowboarding experience. This guide helps women make informed decisions based on their height, weight, and riding style to find the perfect fit.

1.2 Overview of Sizing Factors

When selecting a women’s snowboard, several factors come into play, including height, weight, boot size, riding style, and ability level. These elements interconnect to determine the ideal board size and shape. Height and weight are primary considerations for length, while boot size influences width to prevent drag. Riding style, whether all-mountain, freestyle, or powder, affects the board’s shape and flex. Ability level also plays a role, as beginners may prefer softer flex for ease of control, while advanced riders might opt for stiffer boards for responsiveness. Balancing these factors ensures a snowboard that matches individual needs for performance and comfort.

Choosing the Right Snowboard Length

Choosing the right snowboard length ensures optimal performance and control. Measure height as a starting point, then consider weight, riding style, and ability level for the best fit.

2.1 Measuring Height for Snowboard Length

Height is a key factor in determining snowboard length. Stand tall and measure from the floor to the top of your head. For women, boards typically range from 140cm to 160cm. Beginners often find boards reaching their chin to eyes ideal, while advanced riders may prefer slightly shorter or longer based on style. Taller women may need longer boards for stability, while shorter riders can opt for shorter lengths without sacrificing performance. Always consider weight and riding style alongside height for the perfect fit.

2.2 Weight Distribution and Length

Weight distribution plays a significant role in determining the ideal snowboard length. Lighter riders may find shorter boards more maneuverable, while heavier riders benefit from longer boards for better floatation and control. Generally, riders under 120 lbs (54 kg) may prefer boards around 140-145cm, while those over 150 lbs (68 kg) may need boards closer to 152-160cm. Proper weight distribution ensures stability and responsiveness, allowing for optimal performance across various snow conditions. Balancing weight with length is crucial for achieving the right balance between ease of handling and overall board performance.

2.3 Riding Style and Length Considerations

Riding style significantly influences the ideal snowboard length. Freestyle riders often prefer shorter boards (140-148cm) for easier maneuverability and trick execution. All-mountain riders may opt for medium-length boards (145-155cm) to balance agility and stability. Powder riders benefit from longer boards (152-160cm) for better floatation in deep snow. Directional boards, ideal for speed and control, are typically longer; Riders should consider their primary style to ensure the board length aligns with their performance needs, enhancing responsiveness and overall riding experience. Proper length selection tailored to riding style ensures optimal performance across various terrains and conditions.

2.4 Ability Level and Length Recommendations

Snowboard length recommendations vary by ability level. Beginners benefit from shorter boards (140-148cm) for easier control and maneuverability. Intermediate riders often prefer medium-length boards (145-155cm) to balance stability and responsiveness. Advanced riders may opt for longer boards (152-160cm) for higher speeds and better edge hold. Riders progressing in skill should consider a slightly longer board to accommodate improving techniques. Proper length selection based on ability ensures a more enjoyable and efficient riding experience, allowing riders to focus on skill development and exploring various terrains with confidence.

Understanding Snowboard Width

Snowboard width is crucial for stability and control, with proper fit ensuring boots don’t hang over edges. Wider boards accommodate larger boot sizes, enhancing performance and comfort.

3.1 Boot Size and Snowboard Width

Boot size directly impacts snowboard width, as larger boots require wider boards to prevent toes from dragging in the snow. Proper fit ensures optimal performance and stability. If boots hang over the edges, it can lead to poor edge control and increased risk of catching an edge. Women should match their boot size to the board’s waist width, typically between 240-260mm for average boot sizes. Narrow or wide boards are available to accommodate smaller or larger boots, respectively. Ensuring a balanced fit enhances carving, turning, and overall riding comfort, making it a critical factor in selecting the right snowboard.

3.2 Width Charts for Women’s Snowboards

Width charts for women’s snowboards are essential for ensuring proper fit and performance. Typically, waist widths range from 240mm to 260mm, corresponding to average boot sizes. Proper alignment is crucial, as incorrect widths can affect control and comfort. Charts may vary slightly by brand, so consulting specific guidelines is recommended. Matching boot size to board width ensures efficient edge-to-edge movement and enhances the riding experience. Consider personal preference and riding style when choosing the ideal width for optimal comfort and performance on the slopes.

Snowboard Shape and Its Impact

Snowboard shape significantly influences performance, with directional, true twin, and hybrid options. Each shape offers unique benefits, such as better control, maneuverability, or float in powder conditions.

4.1 Directional Shape Characteristics

A directional snowboard features a longer nose than tail, enhancing float in powder and stability at high speeds. Its shape excels in all-mountain and powder conditions, offering precise control and smooth turns. The directional design allows for better edge hold and responsiveness, making it ideal for intermediate to advanced riders who prioritize performance in varied terrains. This shape is perfect for those seeking a board that balances power and maneuverability, ensuring a superior riding experience across different snow conditions.

4.2 True Twin Shape Benefits

The True Twin shape offers exceptional symmetry, making it ideal for freestyle and all-mountain riding. Its balanced design allows for effortless switch riding and enhanced pop, perfect for tricks and versatility. This shape ensures consistent edge hold in both directions, providing stability and control. True Twin boards are lightweight and lively, making them suitable for riders of all levels. Their versatility excels in various conditions, from park laps to exploring backcountry, offering a blend of performance and playfulness that caters to both intermediate and advanced riders seeking a fun, responsive experience on the mountain.

4.3 Hybrid Shape Features

The hybrid shape combines elements of directional and twin snowboards, offering versatility for various riding styles. It often features a blend of rocker and camber profiles, providing both float in powder and edge hold on groomed runs. Hybrid shapes are ideal for all-mountain riders who want adaptability. They deliver a balanced feel, making them suitable for exploring different terrains. This shape is perfect for women seeking a board that can handle both carving on hardpack and navigating through fresh snow with ease, making it a practical choice for those who enjoy a mix of conditions and riding styles.

Flex and Its Importance

Flex determines a snowboard’s responsiveness and maneuverability. Softer flex suits beginners and freestyle, while stiffer boards excel for speed and control, impacting overall riding performance significantly.

5.1 Soft Flex Snowboards

Soft flex snowboards are ideal for beginners and freestyle riders, offering a forgiving ride. They are lightweight and flexible, making turns easier to initiate and control at slower speeds. This flex is perfect for lighter riders or those with a more relaxed style. Soft flex boards are also great for buttering and jibbing, as they allow for playful manipulation. Riders progressing their skills will appreciate the ease of use, while experienced shredders can enjoy the creative freedom. Soft flex is a key feature for women seeking a board that matches their energy and riding preferences, ensuring a smooth and enjoyable experience on the mountain.

5.2 Medium Flex Snowboards

Medium flex snowboards offer a balanced ride, combining forgiveness with responsiveness. They are versatile, catering to a wide range of riders, from intermediate to advanced. This flex is ideal for all-mountain riding, providing stability at higher speeds while maintaining playfulness for exploring various terrains. Medium flex boards are suitable for women who seek adaptability, allowing them to transition smoothly between carving groomers, navigating trees, and tackling bumps. They strike a perfect balance between soft and stiff, making them a popular choice for riders who enjoy a mix of precision and ease; Medium flex is a reliable option for everyday shredding, ensuring consistent performance across different conditions.

5.3 Stiff Flex Snowboards

Stiff flex snowboards are designed for advanced to expert riders seeking high-performance responsiveness. They excel at high speeds, delivering precise control and edge hold, making them ideal for carving, freeride, and challenging terrain. Stiff boards provide exceptional stability and power, allowing riders to tackle demanding conditions with confidence. However, they are less forgiving, requiring skilled technique to handle effectively. Stiff flex is perfect for women who prioritize performance and are comfortable with a more aggressive riding style. These boards are built for those who demand the best in speed and precision, offering unparalleled responsiveness for experienced shredders.

Boot Size and Fit

Proper boot fit is essential for comfort and performance. Ensure boots match your foot size, providing adequate support and flexibility. Ill-fitting boots can hinder control and cause discomfort.

6.1 How to Size Snowboard Boots

When sizing snowboard boots, try them on with the same socks you’ll wear riding. Ensure a snug fit, with toes lightly touching the front and heels secure. Measure foot length and compare to brand size charts, as sizing varies. Check width to avoid pressure points. Flex should match your riding style—softer for beginners, stiffer for advanced riders. Proper fit balances comfort and responsiveness, ensuring optimal control and performance on the mountain. Pay attention to lacing systems and liner fit for added support and customization.

6.2 Ensuring Proper Boot Fit

Proper boot fit is essential for comfort and performance. Stand up with the boots laced tightly to assess fit. Your toes should lightly touch the front, with no pressure points. Ensure the heel stays secure to prevent lift while flexing. Check for snugness around the midfoot and ankle without constriction. Walk and move to verify mobility and support. Boots that are too tight or too loose can cause discomfort or hinder control. Proper fit ensures responsiveness, warmth, and all-day riding comfort. A well-fitted boot enhances overall snowboarding experience and prevents fatigue or injury.

Ability Level and Snowboard Choice

Snowboard choice varies by ability level, with beginners needing forgiving boards, intermediates seeking balanced performance, and advanced riders opting for specialized designs tailored to their expertise.

7.1 Snowboards for Beginners

Beginners should opt for snowboards that are forgiving and easy to maneuver. A board length between 140cm to 152cm is ideal, reaching chin to eye level when stood vertically. Softer flex ratings provide better control, making it easier to learn turns and balance. Width should match boot size for optimal performance. Directional or true twin shapes are recommended for stability and ease of turning. These features help build confidence and skill progression. Ensure proper fit by consulting size charts and considering weight distribution. The right beginner board will enhance the learning experience and make snowboarding enjoyable from day one.

7.2 Intermediate Rider Options

Intermediate riders benefit from snowboards with balanced performance and versatility. A medium flex rating offers stability and responsiveness, ideal for progressing skills. Lengths between 146cm to 154cm suit most riders, while width should align with boot size for optimal control. All-mountain or hybrid shapes are excellent choices, providing adaptability across various terrains. Ensure the board supports your weight and riding style for consistent performance. Proper fit and balance are key to advancing your technique and exploring more challenging trails with confidence. Choose a board that matches your improving skills to enhance your overall snowboarding experience.

7.3 Advanced Snowboard Selection

Advanced riders require high-performance snowboards tailored to their precise needs. Stiffer flex ratings enhance edge control and responsiveness, ideal for challenging terrains. Length and width should be carefully matched to the rider’s height, weight, and boot size for optimal performance. Directional or true twin shapes are popular for advanced riders, offering superior stability and maneuverability. When selecting a snowboard, consider the specific riding style, such as freeride or freestyle, to ensure the board meets performance demands. Consulting detailed size charts and expert recommendations can help advanced riders find the perfect fit for their skill level and preferences.

Riding Style and Board Match

Riding style significantly influences snowboard choice, with all-mountain, freestyle, and powder boards offering unique features tailored to specific needs, ensuring optimal performance and enjoyment on the slopes.

8.1 All-Mountain Snowboarding

All-mountain snowboarding requires a versatile board that excels in various conditions, from groomed trails to backcountry terrain. Women opting for this style should choose a snowboard with a length between 144cm and 152cm, ensuring it matches their height and weight for optimal control. The width should provide ample stability while maintaining maneuverability. Boards designed for all-mountain riding often feature a directional shape, offering better edge hold and responsiveness. This style is ideal for riders who enjoy exploring diverse terrain and need a reliable, adaptable snowboard to handle it all effectively.

8.2 Freestyle Snowboarding

Freestyle snowboarding emphasizes tricks, jumps, and agility, requiring a shorter, more maneuverable board. Ideal lengths for women range from 138cm to 146cm, allowing for easier rotation and control in the air. A true twin shape is highly recommended, as it enables effortless switch riding and balanced landings. Softer flex ratings enhance flexibility for pressing and buttering tricks. Ensure the width matches your boot size to avoid drag and maintain precision. Freestyle boards are perfect for park riding and creative expression, making them a great choice for women who prioritize agility and playful performance.

8.3 Powder Snowboarding

Powder snowboarding requires a board designed for deep snow and floatation. Women should opt for longer lengths, typically between 152cm and 160cm, to enhance stability and control. A directional shape with a wider nose and tapered tail is ideal, as it improves buoyancy and reduces leg fatigue. Medium to stiff flex ratings provide the necessary response for navigating challenging terrain. Ensure the width accommodates your boot size to prevent drag. Special features like a rockered nose further boost performance in powder conditions, making these boards perfect for adventurous riders seeking thrilling experiences in untouched snow.

Popular Brands for Women

Top brands like Roxy, Burton, and Salomon offer high-quality women’s snowboards in various sizes and styles, ensuring a perfect fit and exceptional performance.

9.1 Top Brands Offering Women’s Sizes

Leading brands such as Roxy, Burton, and Salomon specialize in women’s snowboards, offering a wide range of sizes and styles. These brands prioritize female-specific designs, ensuring optimal performance and comfort. Roxy is known for its durable and stylish boards, while Burton provides versatile options for all skill levels. Salomon focuses on innovative technology for enhanced ride quality. Each brand offers detailed size charts, making it easier for women to find the perfect fit based on height, weight, and riding style. Checking the specific size guides for each brand is essential for the best match.

9.2 Brand-Specific Size Charts

Brand-specific size charts are essential for accurate snowboard sizing. Top brands like Burton, Roxy, and Salomon provide detailed charts tailored to women’s dimensions. These charts often include height, weight, and boot size ranges, ensuring a precise fit. For example, Burton offers a “True Fit” system, while Roxy focuses on female-specific proportions. Always check the brand’s official website for the most accurate and up-to-date sizing information. Using these charts helps women find a board that matches their body type and riding style perfectly, enhancing performance and comfort on the slopes.

Weight and Snowboard Size

Weight is a key factor in determining the ideal snowboard size. Heavier riders may require longer boards for better float and control, while lighter riders prefer shorter options.

10.1 Lightweight Riders

Lightweight riders, typically under 120 pounds, should consider shorter snowboards for better maneuverability and control. A board in the 138-146cm range is often ideal, providing easier handling and improved float in powder. Proper weight distribution ensures the board responds well to input, while shorter lengths reduce fatigue. Width should still match boot size to prevent toe drag and enhance performance. Lightweight riders may also benefit from softer flex patterns for easier turning. Balancing weight with height and riding style ensures the best fit, making every run more enjoyable and efficient on the slopes.

10.2 Average Weight Considerations

For average-weight riders (120-160 pounds), snowboard length should align with height and riding style. A board between 146-152cm is often ideal, offering stability and maneuverability. Proper weight distribution enhances edge control and float in various snow conditions. Ensure the board’s width matches boot size to prevent toe drag and improve performance. Average-weight riders typically prefer medium flex for balanced responsiveness. Consider how weight interacts with height and riding style to find the perfect fit, ensuring optimal performance and comfort on the mountain. This balance is key for an enjoyable and responsive snowboarding experience.

10.3 Heavyweight Options

Heavier riders (over 160 pounds) often benefit from longer snowboards for added stability and float. A board length of 153-160cm is typically recommended, depending on height and riding style. Wider boards may be necessary to accommodate larger boot sizes, ensuring proper toe and heel placement. Stiffer flex ratings are also advantageous for heavier riders, as they provide better edge control and responsiveness. Proper weight distribution is crucial for optimal performance in all snow conditions. Consulting a detailed size chart or seeking expert advice can help heavier riders find the perfect balance of length, width, and flex for their needs.

Height and Snowboard Fit

Height plays a key role in determining snowboard size, with shorter riders needing smaller boards and taller riders requiring longer ones for optimal performance and control.

11.1 Shorter Riders

For women with shorter stature, choosing the right snowboard size is essential for balance and control. A shorter snowboard, typically between 140cm to 148cm, is recommended to match their height. Riders under 5’2″ may find smaller boards easier to maneuver, while those closer to 5’4″ can opt for slightly longer options. Weight and riding style also influence the ideal length, with lighter riders potentially preferring shorter boards and heavier riders needing more stability. Proper boot fit is crucial to ensure comfort and performance, regardless of height. Testing the board’s feel is always advisable for the best fit.

11.2 Average Height Riders

For women of average height, typically between 5’4″ and 5’8″, the ideal snowboard length ranges from 148cm to 152cm. This size range provides optimal control and maneuverability. Lighter riders may prefer the shorter end of this spectrum, while heavier riders might opt for a slightly longer board for stability. Riding style also plays a role—freestyle riders might choose shorter boards for easier tricks, while all-mountain riders might prefer longer boards for better float. Proper boot fit is essential to ensure comfort and performance. Testing the board’s feel is always advisable for the best fit.

11.3 Tall Riders

Tall women, typically those 5’9″ or above, benefit from longer snowboards for better stability and control. Boards in the 153cm to 157cm range are ideal, providing float in powder and edge hold at higher speeds. Heavier riders may prefer stiffer flex for added responsiveness. Riding style also influences the choice—freeride and all-mountain riders often opt for longer lengths, while freestyle riders might prefer shorter boards for maneuverability. Proper boot fit and binding placement are crucial to maintain balance and comfort. Testing the board’s feel is highly recommended to ensure the best match for tall riders’ needs.

Choosing the right snowboard involves balancing height, weight, and riding style. This guide helps women make informed decisions, ensuring optimal performance and comfort on the slopes.

12.1 Final Tips for Choosing the Right Snowboard

When selecting a snowboard, prioritize your height, weight, and riding style to ensure the best fit. Double-check boot compatibility and refer to size charts for accuracy. Always test a board if possible, as feel and performance can vary. Consider reading reviews or consulting experts for additional insights. Remember, the right snowboard enhances control, comfort, and confidence, making every ride more enjoyable. Take your time and don’t hesitate to seek advice to find the perfect match for your needs and preferences.

12.2 Encouragement to Test and Adjust

Testing your snowboard before purchasing is highly recommended to ensure the best fit and performance. Many shops offer demo days or rental options, allowing you to experience different models. Don’t hesitate to adjust your setup as your skills improve or preferences change. Proper fit and feel are key to enjoying your time on the mountain. Remember, it’s okay to seek advice or try multiple options—investing time now ensures a better riding experience later. Confidence and comfort on the snowboard will enhance your overall enjoyment, so take the time to get it right.

westminster chime clock manual pdf

The Westminster Chime Clock is a timeless timepiece featuring the iconic Westminster melody, blending tradition with modern functionality․ Its intricate chime mechanism and historical roots make it a cherished possession, while the comprehensive manual ensures seamless operation and maintenance․ This guide provides essential insights into setting up, operating, and caring for your Westminster Chime Clock, ensuring optimal performance and longevity․

1;1 Understanding the Westminster Chime Mechanism

The Westminster Chime Mechanism is a sophisticated system that produces the iconic Westminster melody, typically played every 15 minutes․ It operates through a series of hammers striking gongs or rods, creating the distinctive chime sequence․ The mechanism is triggered by either a mechanical or quartz movement, ensuring precise timing․ Chime levers allow users to select or disable specific melodies, while a night silencing feature mutes the chimes during preset hours․ This mechanism combines traditional craftsmanship with modern convenience, offering a harmonious blend of functionality and aesthetic appeal․

1․2 Historical Background of Westminster Chime Clocks

The Westminster Chime Clock’s origins trace back to the iconic Big Ben at the Houses of Parliament in London, with the melody dating to the 19th century․ Initially used in public clocks, the chime gained popularity in home clocks during the mid-20th century․ Its rich, resonant tones became synonymous with precision and heritage, reflecting a blend of traditional craftsmanship and modern innovation․ The chime’s historical significance is preserved in each clock, making it a cherished, timeless piece for home and office settings, enduring through generations․

1․3 Importance of the Westminster Chime Clock Manual

The Westminster Chime Clock Manual is essential for proper setup, operation, and maintenance of your timepiece․ It provides detailed guidance for initial steps like unpacking, time setting, and chime activation, ensuring a smooth user experience․ The manual also offers troubleshooting tips for common issues, such as distorted chimes or timekeeping inaccuracies, helping users resolve problems quickly․ Additionally, it covers advanced features like melody selection and volume adjustment, allowing for personalized customization․ Regular maintenance instructions, such as cleaning and lubricating, are included to ensure long-term functionality and preserve the clock’s heritage and performance․

Essential Components of the Westminster Chime Clock

The Westminster Chime Clock consists of a precise movement, a melodious chime mechanism, and a graceful pendulum․ Key components include the dial, hands, and control levers for functionality․

2․1 Movement Types: Mechanical vs․ Quartz

Westminster Chime Clocks are available with either mechanical or quartz movements․ Mechanical movements, like Hermle’s 340 Series, require winding and offer a traditional appeal, while quartz movements, such as those from Howard Miller, operate on batteries, providing accuracy and low maintenance․ Both types power the chime function, ensuring the iconic Westminster melody plays precisely․ The choice between them depends on personal preference for tradition or convenience, with quartz being more modern and mechanical offering a classic experience․

2․2 Key Features of Westminster Chime Clocks

Westminster Chime Clocks boast distinctive features, including the iconic Westminster melody, automatic nighttime silencing, and precise timekeeping․ Many models offer adjustable volume, pendulum swings for mechanical versions, and multiple chime options․ Some clocks feature a chime shift lever to select melodies or silence the chimes․ The combination of traditional craftsmanship and modern innovations ensures these clocks are both functional and aesthetically pleasing․ These features make Westminster Chime Clocks a blend of heritage and convenience, catering to diverse user preferences while maintaining their classic charm․

2․3 Location of Key Controls and Adjustments

Key controls on Westminster Chime Clocks are strategically located for ease of use․ The chime shutoff lever is typically found on the side or back, enabling silent mode․ The regulator for timekeeping adjustments is usually near the pendulum, allowing fine-tuning with a screwdriver․ Volume controls and melody selectors are often on the front or side․ Some models feature a chime shift lever to change melodies․ The nighttime silencing switch is commonly located on the back or side․ Familiarizing yourself with these controls ensures smooth operation and customization of your clock’s features․

Setting Up Your Westminster Chime Clock

Unpack and inspect the clock, then set the time and activate the chime function․ Adjust the nighttime silencing feature and pendulum for accurate timekeeping․ Refer to the manual for smooth setup․

3․1 Unpacking and Initial Inspection

When unpacking your Westminster Chime Clock, carefully remove it from the box along with the pendulum and keys․ Inspect the clock for any visible damage or defects․ Gently remove any protective packaging, such as foam inserts or rubber bands, ensuring all components are accounted for․ Locate the chime shift lever, safety bushing, and regulator for timekeeping adjustments․ Before proceeding, verify that all parts are included and undamaged to ensure proper functionality․ This step ensures a smooth setup process and prevents potential issues down the line․

3․2 Time Setting and Synchronization

Set the time by moving the hour and minute hands clockwise to the current time․ Ensure the chime corresponds to the correct hour․ For quartz models, use the time-setting knob or button, synchronizing with a reliable time source․ Mechanical clocks require winding and precise hand adjustment․ After setting, allow the clock to run for 24 hours to ensure accuracy․ Regular synchronization with an atomic clock or app helps maintain timekeeping precision․ Always refer to the manual for model-specific instructions to avoid discrepancies in chime timing or hour strikes․

3․3 Activating the Chime Function

To activate the chime function, locate the chime shift lever or button, typically found near the clock’s control panel or rear․ Move the lever to the ‘chime’ position or press the designated button․ Ensure the clock is properly set and wound (for mechanical models) or batteries are installed (for quartz models)․ Once activated, the Westminster melody will play on the hour․ Some models may require pulling a switch or pressing a button to enable the chime․ Refer to your manual for specific activation steps, as procedures may vary by model․ If the chime does not sound, check the lever position and ensure the clock is correctly set to the current time․

3․4 Adjusting the Nighttime Silencing Feature

Most Westminster Chime Clocks include an automatic nighttime silencing feature, which mutes the chimes between 10:01 p․m․ and 5:59 a․m․ To adjust this feature, locate the nighttime shut-off switch, often found on the clock’s rear or side․ Move the switch to the “on” or “auto” position to enable silencing․ Some models allow setting specific hours for silence․ Ensure the clock is properly synchronized with the correct time for accurate operation․ Refer to your manual for model-specific instructions, as some clocks may require additional steps to activate this feature․ Testing the silencing function is recommended to confirm proper operation․

Operating the Westminster Chime Clock

Operating your Westminster Chime Clock involves managing the chime sequence, adjusting volume, and maintaining the pendulum for accurate timekeeping․ Use the chime shift lever to customize melodies and ensure smooth functionality․

4․1 Understanding the Chime Sequence

The Westminster Chime Clock features a distinctive chime sequence that plays every quarter hour, with a full melody and hour count on the hour․ The chime lever allows selection of Westminster, Ave Maria, or other sounds․ Volume can be adjusted for comfort, and a nighttime silencing feature mutes chimes between 10:01 PM and 5:59 AM․ The chimes are triggered by an internal striker, ensuring precise timing․ Understanding this sequence helps users appreciate the clock’s traditional charm and customize its operation to suit their preferences, enhancing both functionality and aesthetic appeal․

4․2 Adjusting the Volume and Melody

Customizing your Westminster Chime Clock’s sound involves simple adjustments․ For volume control, locate the dedicated knob or lever, typically on the clock’s rear or side․ Turn it clockwise to increase volume or counterclockwise to decrease it․ For melody selection, use the chime selector lever, which allows you to choose between Westminster, Ave Maria, or other available tunes․ On some models, like the Howard Miller or Hermle, this lever may also activate silent mode․ Adjustments are usually immediate, ensuring your clock’s sound suits your preference․ Refer to the manual for specific instructions tailored to your model․

4․3 Managing the Pendulum for Accurate Timekeeping

The pendulum is crucial for maintaining precise timekeeping in mechanical Westminster Chime Clocks․ To regulate it, locate the regulator screw, usually found at the back or bottom of the clock․ Turning the screw clockwise speeds up the timekeeping, while counterclockwise slows it down․ Make small adjustments and allow the clock to run for 24 hours before rechecking accuracy․ For quartz models, pendulum adjustments are unnecessary, as timekeeping is controlled by the quartz movement․ Always refer to your manual for specific instructions tailored to your clock’s mechanism to ensure optimal performance and accuracy․

4․4 Using the Chime Shift Lever

The chime shift lever allows you to choose between different melodies or silence the chimes․ Move the lever to the desired position to select the Westminster chime, Ave Maria, or Bim-Bam․ Ensure the lever is fully engaged to avoid distorted sounds․ For triple chime models, the lever identifies the melody․ After adjusting, test the chime to ensure it plays correctly․ Refer to your manual for specific instructions, as the lever’s function may vary slightly depending on your clock model․ Proper use ensures seamless melody selection and optimal performance․

Maintenance and Troubleshooting

Regular cleaning and lubrication ensure smooth operation․ Adjust the regulator for accuracy and inspect the pendulum․ Troubleshoot distorted chimes or timekeeping issues promptly for optimal performance․

5․1 Cleaning and Lubricating the Clock Movement

Regular cleaning and lubrication are crucial for maintaining the Westminster Chime Clock’s performance․ Gently remove dust using a soft brush or compressed air․ Lubricate the movement every 2-3 years with high-quality clock oil, focusing on visible pivot points․ Avoid over-lubrication to prevent damage․ Refer to the manual for specific lubrication points and techniques․ Proper maintenance ensures smooth operation, accurate timekeeping, and preserves the clock’s longevity․ Always follow the manual’s guidelines to avoid compromising the mechanism․

5․2 Regulating the Timekeeping Accuracy

Accurate timekeeping is essential for your Westminster Chime Clock․ To regulate the clock, locate the regulator screw, typically found near the pendulum․ Turn the screw clockwise to speed up the timekeeping or counterclockwise to slow it down․ Make small adjustments and allow the clock to run for 24 hours to assess accuracy․ For mechanical models, ensure the pendulum swings evenly․ Refer to the manual for specific instructions, as improper adjustments can affect performance․ Regular regulation ensures your clock remains precise and reliable over time․

5․3 Troubleshooting Common Issues

Common issues with Westminster Chime Clocks include distorted chimes, timekeeping inaccuracies, or mechanical malfunctions․ If chimes are distorted, ensure proper pendulum alignment and check for dust buildup․ For timekeeping issues, verify regulator adjustments and clean the movement annually․ If the clock stops, inspect the power source or winding mechanism․ Refer to the manual for specific troubleshooting steps, as procedures vary between mechanical and quartz models․ Addressing these issues promptly ensures optimal performance and longevity of your Westminster Chime Clock․

5․4 Addressing Distorted Chimes or Timekeeping Problems

Distorted chimes or timekeeping issues can often be resolved by inspecting the movement for dust or misalignment․ Ensure the pendulum swings freely and is properly aligned․ For mechanical models, clean and lubricate the movement annually․ If chimes are uneven, adjust the chime hammers or ensure the strike train is engaged․ For timekeeping errors, regulate the clock by turning the adjustment screw․ Quartz models may require battery replacement․ Refer to the manual for specific instructions, as procedures vary by model․ Prompt attention ensures your Westminster Chime Clock performs flawlessly․

Advanced Features of the Westminster Chime Clock

Explore advanced features like multiple melody selections, volume control, automatic nighttime shut-off, and customizable pendulum settings․ These enhancements offer personalized convenience and refined timekeeping experiences․

6․1 Selecting Different Melodies

Westminster Chime Clocks often feature multiple melody options, including the classic Westminster chime, Ave Maria, and Bim-Bam․ The manual explains how to select these using a melody switch or lever․ Users can choose their preferred tune, with some models offering seasonal melodies like Christmas songs․ The process typically involves moving a selector switch to the desired position, ensuring the chime aligns with the chosen melody․ This feature adds versatility, allowing the clock to adapt to different settings or personal preferences while maintaining its timeless appeal and functionality․

6․2 Adjusting the Chime Volume

Adjusting the chime volume on a Westminster Chime Clock is straightforward, as detailed in the manual․ Most models feature a dedicated volume control knob or slider, allowing users to customize the sound level․ For mechanical clocks, the volume is often regulated by the strike mechanism’s damper or the position of the bell․ Quartz clocks typically have an electronic volume adjustment, providing precise control․ This feature ensures the chimes can be tailored to suit any environment, from soft background sounds to rich, resonant tones, enhancing the clock’s versatility and user satisfaction․

6․3 Setting Up the Automatic Nighttime Shut-Off

The automatic nighttime shut-off feature on Westminster Chime Clocks ensures silent operation during late hours․ According to the manual, this feature typically activates between 10:01 p․m․ and 5:59 a․m․, preventing chimes from disturbing the household; To enable this function, locate the shut-off switch, usually found on the clock’s back or side․ Flip the switch to the “on” position to activate the feature․ Some models, like the Howard Miller Westminster Quartz Chime Clock, allow for precise customization of these hours․ This feature enhances convenience, ensuring peaceful nights while maintaining the clock’s traditional charm and functionality․

6․4 Customizing the Pendulum Swing

Customizing the pendulum swing on your Westminster Chime Clock enhances timekeeping accuracy and aesthetic appeal․ To adjust, gently grasp the pendulum and move it left or right to regulate its swing․ Some models feature an adjustment screw or lever near the pendulum’s base․ Small adjustments can significantly impact accuracy․ Refer to the manual for specific guidance, as improper adjustments may affect performance․ Proper customization ensures smooth operation and precise timekeeping, maintaining the clock’s reliability and charm․ Always follow the manufacturer’s instructions for optimal results․

Downloading and Using the Westminster Chime Clock Manual

The Westminster Chime Clock manual is readily available as a downloadable PDF online․ Access it through official manufacturer websites or authorized retailers for detailed setup, operation, and maintenance guidance․

7․1 Finding the Official Manual PDF

To locate the official Westminster Chime Clock manual, visit the manufacturer’s website or authorized retailers․ Search for your specific clock model, as many brands like Howard Miller or Hermle provide dedicated PDF downloads․ Ensure the manual is from a trusted source to avoid unofficial or incomplete guides․ Use keywords like “Westminster Chime Clock manual PDF” or include your clock’s model number for precise results․ Official manuals are often found in the support or downloads section of the manufacturer’s site, ensuring authenticity and relevance for your timepiece․

7․2 Navigating the Manual for Specific Instructions

Once you’ve downloaded the official Westminster Chime Clock manual, navigate through its sections using the table of contents or index․ Look for specific topics like time setting, chime activation, or troubleshooting․ The manual is typically organized by tasks, such as initial setup, daily operation, and maintenance․ Use the search function in your PDF viewer to quickly locate keywords like chime shift lever or pendulum adjustment․ Familiarize yourself with diagrams and step-by-step guides for clarity․ This structured approach ensures you find the information you need efficiently․

7․3 Printing and Organizing the Manual for Easy Reference

Print the Westminster Chime Clock manual on high-quality paper for easy reading․ Organize the pages in a binder or folder, separating sections like setup, operation, and troubleshooting․ Use tabs or dividers to quickly locate specific topics․ Consider highlighting key instructions or frequently used sections for quick reference․ Store the manual near your clock for convenience․ For digital preference, save the PDF in a dedicated folder on your device and bookmark essential pages․ This organized approach ensures easy access to guidance, making maintenance and operation more efficient․

Proper setup, regular maintenance, and troubleshooting ensure your Westminster Chime Clock’s effectiveness and longevity․ Follow the manual for optimal performance and years of enjoyment․

8․1 Summary of Key Takeaways

Setting up and maintaining your Westminster Chime Clock requires attention to detail, as outlined in the manual․ Regularly clean and lubricate the movement, regulate timekeeping, and troubleshoot common issues promptly․ Understanding the chime sequence, adjusting volume, and managing the pendulum are essential for optimal performance․ Utilize the nighttime silencing feature and customize settings like melody selection and automatic shut-off․ Refer to the manual for specific instructions and ensure proper care to extend the clock’s lifespan․ By following these guidelines, you’ll enjoy a beautifully functioning timepiece for years to come․

8․2 Best Practices for Long-Term Maintenance

Regularly clean and lubricate the clock’s movement to prevent wear and tear․ Check the timekeeping accuracy periodically and adjust as needed to maintain precision․ Handle the pendulum with care to ensure consistent operation․ Avoid exposing the clock to extreme temperatures or humidity, as this can affect its mechanism․ Perform seasonal inspections to verify all components are functioning properly․ Store the manual in an accessible location for quick reference․ By following these practices, you’ll preserve the clock’s beauty and functionality for generations․

8․3 Resources for Further Assistance

For additional support, refer to the official Westminster Chime Clock manual, available as a downloadable PDF online․ Manufacturer websites, such as Howard Miller or Hermle, often provide detailed guides and troubleshooting tips․ Contact customer support for direct assistance with specific issues․ Online forums and clock enthusiast communities can also offer valuable insights and solutions․ Regularly check for updated manuals or firmware to ensure your clock operates at its best․ Utilize these resources to address any concerns and maintain your clock’s optimal performance․

security guard test questions and answers pdf ontario

The Ontario Security Guard Test is a mandatory exam for individuals seeking a security license in Ontario. It ensures candidates possess essential knowledge and skills for the role.

The test covers legal aspects‚ emergency response‚ communication‚ and provincial regulations. Preparation is crucial to pass the 60-question multiple-choice exam within the 75-minute time limit.

Free practice quizzes‚ PDF guides‚ and video tutorials are available to help candidates prepare effectively for the test and understand the expectations of the security profession.

1.1 Overview of the Security Guard License in Ontario

The Ontario Security Guard License is a legal requirement for individuals working in the security industry within the province. It is issued by the Ontario government and ensures that guards meet specific standards and regulations.

To obtain the license‚ applicants must pass a mandatory test‚ complete required training‚ and undergo a background check. The license is valid for a set period and must be renewed to maintain active status in the profession.

1.2 Importance of Preparing for the Test

Preparing for the Ontario Security Guard Test is essential to ensure success and understanding of the role’s responsibilities. The test evaluates knowledge of legal standards‚ emergency protocols‚ and communication skills‚ all critical for effective security work.

Adequate preparation helps candidates avoid common mistakes‚ builds confidence‚ and ensures they meet the professional and regulatory expectations required for the license. Utilizing study materials‚ such as practice questions and guides‚ significantly improves readiness and performance on the exam.

Exam Format and Structure

The Ontario Security Guard Test is a multiple-choice exam consisting of 60 questions. Candidates have 75 minutes to complete it‚ ensuring they understand the format and time constraints.

2.1 Multiple-Choice Question Format

The Ontario Security Guard Test features a multiple-choice format‚ with each question offering four possible answers. Candidates must select the correct response‚ ensuring they understand the topic thoroughly. This format tests critical thinking and knowledge retention. Questions cover legal aspects‚ emergency procedures‚ and communication skills. Each question is designed to assess comprehension of key concepts. To succeed‚ candidates should practice eliminating incorrect options. Free PDF resources and practice tests are available online‚ providing examples of this format. Understanding the multiple-choice structure is essential for effective preparation and achieving a high score. Proper time management is also crucial during the exam.

2.2 Time Limit and Number of Questions

The Ontario Security Guard Test consists of 60 multiple-choice questions‚ and candidates have 75 minutes to complete the exam. This time limit is designed to ensure a thorough assessment of knowledge while maintaining a manageable pace. Proper time management is essential‚ as candidates must allocate approximately one minute per question. The exam’s structure allows for careful reading and consideration of each option. Practicing with sample tests can help candidates improve their speed and accuracy. Understanding the time constraints is crucial for effective preparation and achieving success on the test. Plan your time wisely to avoid rushing and ensure all questions are answered.

Key Topics Covered in the Test

The Ontario Security Guard Test covers legal aspects‚ emergency response‚ communication‚ and the Private Security and Investigative Services Act‚ ensuring comprehensive knowledge for professional security roles.

3.1 Legal Aspects of Security Guard Work

The legal aspects section focuses on understanding the rights and responsibilities of security guards in Ontario. Topics include arrest powers‚ use of force‚ and privacy laws. Candidates must know the legal boundaries of their authority to avoid unlawful actions. This section also covers liability issues and the importance of adhering to provincial regulations. Proper knowledge ensures guards operate within the law‚ protecting both themselves and others. Understanding these legal principles is essential for ethical and professional conduct in the security industry.

3.2 Emergency Response and First Aid

Emergency response and first aid are critical components of the Ontario Security Guard Test. Candidates must demonstrate knowledge of proper procedures during crises‚ such as fires‚ medical emergencies‚ and evacuations. Understanding basic first aid techniques‚ including CPR and wound management‚ is essential. The test also covers the use of emergency equipment like fire extinguishers and AEDs. Familiarity with protocols for contacting emergency services and securing scenes is vital. This section ensures guards can respond effectively to life-threatening situations‚ prioritizing safety and minimizing risks. Proficiency in these areas is crucial for protecting lives and maintaining order during emergencies.

3.3 Communication and Conflict Resolution

Effective communication and conflict resolution are vital skills for security guards. The test assesses the ability to handle difficult situations calmly and professionally. Candidates must understand how to use verbal and non-verbal communication to de-escalate conflicts. Questions may cover active listening‚ remaining neutral‚ and resolving disputes without aggression. Understanding cultural sensitivity and diverse communication styles is also emphasized. Security guards must know how to document incidents accurately and communicate clearly with colleagues and authorities. These skills ensure safe and efficient resolution of conflicts‚ maintaining order and protecting people and property. Mastery of these areas is essential for professional competence in security roles.

3;4 Private Security and Investigative Services Act

The Private Security and Investigative Services Act (PSISA) governs the licensing and regulation of security guards in Ontario. The test evaluates understanding of key aspects‚ including licensing requirements‚ code of conduct‚ and prohibited practices. Candidates must know the legal standards for security professionals‚ such as duties‚ responsibilities‚ and ethical behavior. Questions also cover the role of the Ministry of the Solicitor General in overseeing the industry. Understanding PSISA ensures compliance with provincial laws and maintains public trust in security services. This section is critical for legal awareness and professional accountability in the security field.

Sample Questions and Answers

Sample questions and answers provide insights into the test format‚ covering legal aspects‚ emergency response‚ and provincial regulations. They help candidates prepare effectively for the exam.

4.1 Legal and Regulatory Questions

Legal and regulatory questions assess knowledge of Ontario’s security laws and regulations. Examples include understanding the Private Security and Investigative Services Act‚ legal powers of security guards‚ and compliance requirements. These questions ensure candidates are aware of their responsibilities and limitations under provincial law. Proper preparation involves studying legal frameworks and real-life scenarios to apply knowledge effectively during the test. Understanding these concepts is vital for professional competence and adherence to regulatory standards in the security industry. These questions are designed to evaluate a candidate’s ability to operate within legal boundaries and uphold professional standards.

4.2 Emergency Response Scenarios

Emergency response questions test a candidate’s ability to handle critical situations like fires‚ medical emergencies‚ or evacuations. These scenarios require knowledge of proper protocols and procedures to ensure safety and compliance with regulations. Questions often present real-life challenges‚ asking how to respond appropriately. For example‚ “What steps should a security guard take during a fire alarm?” or “How to provide first aid until professional help arrives?” These questions evaluate quick decision-making and adherence to training guidelines. Understanding emergency procedures is crucial for effective response and public safety in various security roles. Proper training and preparation are essential to answer these questions confidently.

4.3 Communication and Conflict Resolution

Communication and conflict resolution questions assess a candidate’s ability to de-escalate tense situations and interact effectively with the public. These questions may present scenarios requiring clear dialogue or non-verbal cues to resolve disputes. For instance‚ “How would you handle a confrontational individual?” or “What strategies minimize conflict in a crowded area?” Answers must demonstrate active listening‚ professionalism‚ and adherence to ethical standards; Effective communication is vital in security roles to maintain order and ensure safety. Proper training in conflict resolution techniques is essential for success in these types of scenarios.

4.4 Private Security and Investigative Services Act

Questions under this section focus on the Private Security and Investigative Services Act (PSISA)‚ which governs security guards in Ontario. Candidates are tested on their understanding of licensing requirements‚ prohibited acts‚ and professional conduct. Sample questions include‚ “What is required to work as a security guard in Ontario?” or “What actions are considered violations under PSISA?” Answers must reflect knowledge of legal standards‚ ethical practices‚ and the role of the Ministry in regulating the industry. Understanding PSISA ensures guards operate within legal boundaries and maintain professional integrity. This section is critical for compliance and effective job performance.

Study Resources and Materials

Free online practice quizzes‚ downloadable PDF guides‚ and video tutorials provide comprehensive study materials for the Ontario Security Guard Test preparation‚ including practice questions and exam insights.

5.1 Free Online Practice Quizzes

Free online practice quizzes are an excellent resource for preparing for the Ontario Security Guard Test. These quizzes feature multiple-choice questions covering key topics such as legal aspects‚ emergency response‚ and communication. They simulate real test conditions‚ helping candidates assess their readiness. Many quizzes are available on websites like Ontario Security Guard Test preparation sites and include 21 to 97 questions. Platforms like Docsity offer downloadable PDF versions for offline study. These tools help identify weak areas and improve understanding of the test format. Regular practice ensures familiarity with the question types and builds confidence for the actual exam.

5.2 PDF Guides and Study Manuals

PDF guides and study manuals are comprehensive resources for preparing for the Ontario Security Guard Test. These documents often include sample questions‚ detailed explanations‚ and practice exercises. Many PDFs contain 21 to 97 multiple-choice questions covering legal aspects‚ emergency response‚ and provincial regulations. They are designed to align with the Ministry’s curriculum‚ ensuring relevance and accuracy. Some guides also provide answer keys and tips for effective study. These manuals are widely available online‚ with popular sources including official government websites and educational platforms like Docsity. They are ideal for offline study and offer in-depth insights into the test format and content.

5.3 Video Tutorials and Preparation Courses

Video tutorials and preparation courses are excellent tools for preparing for the Ontario Security Guard Test. These resources provide engaging and interactive learning experiences‚ covering key topics such as legal aspects‚ emergency response‚ and conflict resolution. Many videos are available on platforms like YouTube and specialized websites‚ offering step-by-step explanations and practical tips. Some courses also include mock tests and sample questions to simulate real exam conditions. These tutorials are designed to help candidates understand complex concepts and build confidence. They are particularly useful for visual learners and those who prefer a structured study approach. Utilizing these resources can significantly enhance test readiness and performance.

Preparation Strategies

  • Create a study schedule to cover all topics systematically.
  • Use practice tests to identify and improve weak areas.
  • Review security guard test questions and answers PDF for better understanding.
  • Focus on legal aspects and emergency response scenarios.
  • Allocate time for each section to manage the 75-minute limit effectively.

6.1 Effective Study Techniques

Effective study techniques for the Ontario Security Guard Test involve active recall‚ spaced repetition‚ and contextual learning. Start by understanding key concepts rather than memorizing answers. Use flashcards to review legal terms and emergency procedures. Practice with timed quizzes to simulate exam conditions. Focus on weak areas identified through practice tests. Review security guard test questions and answers PDF to familiarize yourself with question formats. Engage in group studies to discuss challenging topics. Prioritize consistent study sessions over cramming to ensure long-term retention. Regularly test yourself to track progress and adjust your study plan accordingly.

6.2 Time Management During the Test

Effective time management is crucial for success in the Ontario Security Guard Test. The exam consists of 60 multiple-choice questions with a 75-minute time limit‚ allowing approximately 1.25 minutes per question. Allocate time wisely: spend 30-45 seconds on straightforward questions and up to 1.5 minutes on complex ones. Skim through the test to answer easier questions first‚ marking difficult ones for later. Avoid spending too long on a single question‚ as it may leave insufficient time for others. Use practice quizzes to improve pacing and ensure you complete all questions within the allotted time.

Common Mistakes to Avoid

Common mistakes include misunderstanding question types‚ mismanaging time‚ and not reviewing answers. Candidates often overlook legal specifics or confuse emergency protocols‚ leading to incorrect responses.

7.1 Misunderstanding Question Types

Misunderstanding question types is a common mistake. Candidates may confuse legal scenarios with emergency protocols or misinterpret communication strategies. Many questions are phrased to test specific knowledge‚ such as distinctions between legal and illegal actions or appropriate conflict resolution techniques. Others may involve situational judgment‚ requiring candidates to apply regulations like the Private Security and Investigative Services Act. Misreading questions or rushing through them can lead to incorrect answers. It’s crucial to read each question carefully and ensure understanding before selecting an answer. Proper preparation and practice can help candidates recognize and avoid these misunderstandings during the test.

7.2 Time Mismanagement

Time mismanagement is a frequent issue during the test. Candidates often spend too much time on complex questions‚ leaving insufficient time for others. With 60 questions and a 75-minute limit‚ allocating about 1.25 minutes per question is essential. Rushing through questions can lead to careless errors‚ while lingering too long may result in incomplete answers. Effective time management strategies‚ such as skipping difficult questions and revisiting them later‚ can improve performance. Practicing with timed mock exams helps build speed and accuracy‚ ensuring candidates complete the test within the allotted time and minimize stress during the actual exam.

The Importance of the Security Guard Test

The Ontario Security Guard Test ensures professional competence and accountability‚ meeting regulatory standards to maintain public safety and uphold the integrity of the security profession.

8.1 Ensuring Professional Competence

The Ontario Security Guard Test plays a pivotal role in ensuring that all aspiring security professionals meet the necessary standards of competence. By assessing knowledge in areas such as legal responsibilities‚ emergency response‚ and conflict resolution‚ the test guarantees that individuals are adequately prepared to handle real-world scenarios. This not only enhances public safety but also elevates the overall professionalism of the security industry. Candidates who pass the test demonstrate their ability to perform duties ethically and effectively‚ ensuring they are qualified to serve in this critical role.

8.2 Meeting Regulatory Requirements

The Ontario Security Guard Test ensures compliance with the Private Security and Investigative Services Act‚ 2005‚ and other regulatory standards. By passing the exam‚ candidates demonstrate their understanding of legal obligations‚ ethical practices‚ and professional conduct. This adherence to regulations is essential for maintaining public trust and ensuring the security industry operates within legal frameworks. The test acts as a benchmark‚ verifying that guards are equipped to meet all necessary requirements. This compliance not only upholds individual accountability but also supports the overall integrity of the security profession in Ontario‚ making it a critical step in the licensing process.

Additional Resources

Official government links and security guard forums provide valuable resources‚ including study guides and interactive support‚ helping candidates prepare effectively for the Ontario Security Guard Test.

9.1 Official Government Links

Official government links provide essential resources for preparing for the Ontario Security Guard Test. The Ontario government website offers authentic study materials‚ including official guides and sample questions. These resources are designed to help candidates understand the exam format and content. They also provide detailed information on licensing requirements and procedures. Additionally‚ official links often include instructions for downloading necessary forms and accessing updates on regulatory changes. Utilizing these resources ensures candidates have accurate and reliable information to aid in their preparation. They are a cornerstone for anyone aiming to succeed in the Ontario Security Guard Test and meet all regulatory standards effectively.

9.2 Security Guard Forums and Communities

Security guard forums and communities are valuable resources for candidates preparing for the Ontario Security Guard Test. These platforms offer a space to discuss exam strategies‚ share study materials‚ and gain insights from experienced professionals. Many forums include threads dedicated to sharing PDF study guides‚ practice questions‚ and answers. Additionally‚ they provide opportunities to ask questions and receive feedback from those who have already taken the test. These communities often highlight common mistakes and offer tips for effective preparation. Engaging with these forums can enhance your understanding of the test format and content while fostering a sense of support and collaboration among candidates.

beats solo 3 instruction manual

The Beats Solo 3 Wireless Headphones offer a perfect blend of style and performance‚ featuring the Apple W1 chip for seamless pairing‚ up to 40 hours of battery life‚ and Fast Fuel charging for quick power-ups. Designed with a sleek on-ear fit‚ these headphones deliver crisp‚ balanced sound and comfortable wear for all-day listening. Their lightweight frame and premium materials ensure durability‚ making them ideal for both everyday use and travel.

1.1. Key Features and Overview

The Beats Solo 3 Wireless Headphones are designed for high-quality audio and convenience. Equipped with the Apple W1 chip‚ they offer seamless pairing with Apple devices and Class 1 Bluetooth for extended range. With up to 40 hours of battery life‚ they provide all-day listening. The Fast Fuel feature delivers up to 3 hours of playback with just 10 minutes of charging. Lightweight and foldable‚ they feature a sleek on-ear design with cushioned ear cups for comfort. The headphones support multi-device connectivity and include a carrying case for easy portability‚ making them ideal for everyday use and travel.

1.2. Compatibility and System Requirements

The Beats Solo 3 Wireless Headphones are compatible with iOS devices‚ including iPhones and iPads running iOS 10 or later‚ and Macs. They also support Android devices. Automatic firmware updates occur when paired with iOS devices. The Beats app‚ available for both iOS and Android‚ offers customization options. Designed for versatility‚ these headphones work seamlessly across multiple platforms‚ ensuring a consistent audio experience regardless of your device.

Unboxing and Physical Overview

The Beats Solo 3 Wireless Headphones come with a carrying case‚ 3.5mm RemoteTalk cable‚ USB charging cable‚ and quick start guide. Sleek‚ durable‚ and lightweight‚ the headphones feature an ergonomic design for comfort and portability.

2;1. What’s Included in the Box

The Beats Solo 3 Wireless Headphones box includes the headphones‚ a carrying case‚ 3.5mm RemoteTalk cable‚ USB charging cable‚ and a quick start guide. The carrying case is compact and durable‚ designed for easy transport. The 3.5mm cable allows for wired listening and control of music and calls. The USB cable is used for charging‚ ensuring quick power-ups. The quick start guide provides essential setup and usage instructions. These accessories ensure a seamless and convenient experience‚ covering all basic needs for listening‚ charging‚ and portability.

2.2. Design and Build Quality

The Beats Solo 3 Wireless Headphones feature a sleek‚ lightweight design with an on-ear fit‚ offering both comfort and style. The durable stainless steel frame ensures long-lasting performance‚ while the premium ear cushions provide a secure and comfortable listening experience. The headphones are built with high-quality materials‚ including a sturdy headband and pivoting ear cups for a personalized fit. Their compact design makes them easy to carry‚ and the inclusion of a carrying case adds further protection. The overall build is robust‚ balancing aesthetic appeal with functional durability for everyday use and travel.

2.3. Controls and Buttons Layout

The Beats Solo 3 Wireless Headphones feature intuitive controls for easy operation. On the right ear cup‚ you’ll find a multifunctional button that handles playback‚ track skipping‚ and call management. A dedicated volume control is located above and below this button‚ allowing for seamless adjustments. The power and pairing button is situated on the right ear cup‚ enabling quick pairing with Bluetooth devices. A Fuel Gauge LED indicates battery status‚ while the 3.5mm headphone jack and Micro-USB port are located on the bottom for wired connections and charging. The controls are designed for easy access‚ ensuring a smooth user experience.

Setting Up Your Beats Solo 3 Wireless

Setting up your Beats Solo 3 Wireless involves charging‚ turning them on‚ and pairing with your device. Follow the instructions to ensure a smooth setup process.

3.1. Charging the Headphones

To charge your Beats Solo 3 Wireless‚ use the included Micro-USB cable. Connect the cable to the headphones and plug the other end into a USB power source. The Fuel Gauge LEDs will indicate charging progress: one LED for low battery‚ two for medium‚ and three for fully charged. It takes about 2 hours for a full charge‚ but with Fast Fuel‚ just 5 minutes of charging provides up to 3 hours of playback. Avoid using third-party chargers to ensure safety and optimal performance. Always update firmware during charging if prompted for the latest features and improvements.

3.2. Turning On and Off

To turn on your Beats Solo 3 Wireless‚ press and hold the power button located on the right earcup until the Fuel Gauge LEDs flash. Release the button when the LEDs light up‚ indicating the headphones are on. To turn them off‚ press and hold the same button until the LEDs turn off. The headphones will automatically shut down after a period of inactivity to conserve battery life. Ensure the power button is pressed firmly to avoid accidental activation. The LEDs will provide visual feedback during the power cycle process.

3.3. Initial Pairing with a Device

To pair your Beats Solo 3 Wireless with a device‚ start by turning on the headphones. Press and hold the power button until the Fuel Gauge LEDs flash‚ indicating pairing mode. On your device (e.g.‚ iPhone‚ iPad‚ or Mac)‚ enable Bluetooth and select “Beats Solo3 Wireless” from the available options. Once connected‚ the LEDs will stop flashing‚ confirming the pairing. For Android devices‚ ensure Bluetooth is enabled and select the headphones from the device list. The headphones will automatically reconnect to previously paired devices‚ providing a seamless experience across your ecosystem.

Bluetooth Connectivity and Pairing

The Beats Solo 3 Wireless supports Bluetooth connectivity with a range of up to 30 feet‚ ensuring a stable and reliable connection. Equipped with the Apple W1 chip‚ it offers seamless pairing with Apple devices and compatibility with Android devices. The headphones deliver up to 40 hours of battery life‚ providing extended listening sessions; Their Class 1 Bluetooth technology enhances connectivity strength and maintains clear audio quality across devices.

4.1. How to Pair with an iPhone or iPad

To pair your Beats Solo 3 Wireless with an iPhone or iPad‚ ensure Bluetooth is enabled on your device. Turn on your headphones by holding the power button until the Fuel Gauge flashes. On your iPhone or iPad‚ go to Settings > Bluetooth. Select “Beats Solo3 Wireless” from the available devices. If prompted‚ confirm the pairing request. The pairing process is quick and seamless‚ thanks to the Apple W1 chip. Once connected‚ a voice prompt will confirm the successful pairing‚ and the Fuel Gauge will stop flashing. Your headphones are now ready to stream audio from your iOS device.

4.2. Pairing with an Android Device

To pair your Beats Solo 3 Wireless with an Android device‚ start by enabling Bluetooth on your device. Turn on your headphones by pressing and holding the power button until the Fuel Gauge flashes. Open your Android device’s Bluetooth settings and select “Beats Solo3 Wireless” from the list of available devices. If prompted‚ confirm the pairing request. Once connected‚ you’ll hear a voice prompt confirming the successful pairing. The Fuel Gauge will stop flashing‚ indicating that your headphones are ready to stream audio from your Android device seamlessly.

4.3. Connecting to a Mac or Other Bluetooth Devices

To connect your Beats Solo 3 Wireless to a Mac or other Bluetooth devices‚ ensure the headphones are turned on and in pairing mode. On your Mac‚ click the Apple menu‚ select System Preferences‚ and choose Bluetooth. Click “Turn Bluetooth On” and select “Beats Solo3 Wireless” from the list of available devices. For other devices‚ enable Bluetooth‚ locate the headphones in the device list‚ and confirm the pairing. Once connected‚ the Fuel Gauge will stop flashing‚ indicating a successful connection. This process works similarly for other Bluetooth-enabled devices‚ ensuring seamless audio streaming.

Using Your Beats Solo 3 Wireless

Experience seamless music and call management with the Beats Solo 3 Wireless. Enjoy up to 40 hours of battery life and Fast Fuel charging for quick power-ups. The on-ear design provides clear‚ balanced sound‚ while the lightweight frame ensures all-day comfort. Easily control playback‚ adjust volume‚ and manage calls with intuitive controls‚ making it perfect for everyday use.

5.1. Playback Controls and Functions

The Beats Solo 3 Wireless features intuitive controls for managing your music and calls. Use the “b” button to play/pause your music or answer/end calls. Double-tap to skip to the next track and triple-tap to go back. The volume controls are located on the earcup‚ allowing you to easily adjust the sound to your liking. Press once to increase volume and press and hold to decrease. These controls provide a seamless listening experience‚ enabling you to manage your audio without needing your device. The design ensures easy access and operation‚ enhancing overall user convenience and functionality.

5.2. Adjusting Volume and Sound Settings

Adjusting the volume on the Beats Solo 3 Wireless is straightforward. Use the volume controls located on the earcup to increase or decrease the sound. Press once to raise the volume and press and hold to lower it. For sound customization‚ the Beats app allows you to tweak settings like noise cancellation and audio preferences. These features ensure a personalized listening experience‚ letting you tailor the sound to your liking while maintaining clarity and bass response. The intuitive design makes it easy to fine-tune your audio settings without interrupting your music or calls.

5.3. Managing Calls and Voice Assistant

Managing calls and voice assistant features on the Beats Solo 3 Wireless is seamless; To answer a call‚ press the multi-function button located on the earcup. Press again to end the call or press and hold to decline it. The built-in microphone ensures clear voice capture during calls. For voice assistant functionality‚ press and hold the button to activate Siri or your device’s default voice assistant. This allows hands-free control for playback‚ calls‚ and other tasks. The intuitive button layout makes it easy to manage calls and access voice commands without removing your headphones.

Advanced Features and Customization

Customize your Beats Solo 3 experience using the Beats app‚ enabling multi-device connectivity‚ custom sound profiles‚ and seamless firmware updates for enhanced performance.

6.1. Customizing Settings via the Beats App

The Beats app allows you to tailor your Solo 3 Wireless experience with personalized settings. Adjust sound profiles to suit your preferences‚ check battery life‚ and update firmware seamlessly. The app also enables multi-device connectivity‚ letting you switch between devices effortlessly. Additionally‚ you can customize playback controls and activate features like Fast Fuel charging. The app provides a user-friendly interface to manage your headphones’ settings‚ ensuring optimal performance and a tailored listening experience. Regular updates via the app keep your headphones up-to-date with the latest features and improvements.

6.2. Using Multi-Device Connectivity

The Beats Solo 3 Wireless supports multi-device connectivity‚ allowing you to pair and switch between compatible devices seamlessly. With the W1 chip‚ you can connect to multiple iCloud-linked devices‚ ensuring a smooth transition between your iPhone‚ iPad‚ Mac‚ or Apple Watch. Simply pair your headphones with one device‚ and they’ll automatically recognize other connected devices. This feature enhances convenience‚ enabling you to take calls on your iPhone and switch to listening to music on your Mac without manual re-pairing. The multi-device capability ensures uninterrupted audio experiences across your Apple ecosystem‚ making it ideal for everyday use.

6.3. Updating Firmware and Software

Updating the firmware and software on your Beats Solo 3 Wireless ensures optimal performance and access to the latest features. The W1 chip enables automatic updates when connected to an iPhone or iPad‚ so no manual intervention is typically required. For manual updates‚ use the Beats app on your iOS or Android device to check for and install the latest software. If issues arise‚ resetting the headphones by holding the power button for 10 seconds can help. Keeping your firmware up-to-date ensures compatibility‚ improves connectivity‚ and enhances overall functionality for a seamless listening experience.

Troubleshooting Common Issues

Troubleshooting common issues with your Beats Solo 3 Wireless ensures uninterrupted use. Resetting the headphones by pressing the power button for 10 seconds often resolves connectivity and sound problems.

7.1. Connectivity Problems and Solutions

Experiencing connectivity issues with your Beats Solo 3 Wireless? Start by resetting your headphones: press and hold the power button for 10 seconds until the Fuel Gauge flashes. Ensure your device’s Bluetooth is enabled and disconnect other nearby Bluetooth devices to avoid interference. If pairing fails‚ restart both your headphones and device‚ then retry pairing. For persistent issues‚ forget the device from your headphones and re-pair them. Check for firmware updates in the Beats app‚ as outdated software can cause connection problems. If issues persist‚ contact Beats Support for further assistance.

7.2; Sound Quality Issues and Fixes

If you’re experiencing sound quality issues with your Beats Solo 3 Wireless‚ try resetting the headphones by pressing and holding the power button for 10 seconds. Ensure the ear cushions are clean‚ as dirt or debris can muffle sound. If audio sounds distorted‚ check that the volume on both the headphones and your device is balanced. Avoid maxing out the volume‚ as this can cause sound degradation. For low sound‚ ensure the headphones are properly fitted and not loose. If issues persist‚ update the firmware via the Beats app and restart your device. If water exposure occurs‚ allow the headphones to dry completely before use.

7.3. Resetting the Headphones

To reset your Beats Solo 3 Wireless‚ press and hold the power button for 10 seconds until the Fuel Gauge flashes. This restores factory settings‚ resolving connectivity or sound issues. Ensure no debris is blocking the audio ports‚ as this can affect sound quality. If water exposure occurs‚ let the headphones dry completely before use. Resetting does not erase paired devices but ensures proper functionality. Perform this reset if you notice inconsistent performance or connectivity problems. Regular resets can help maintain optimal performance and sound quality over time.

Maintenance and Care

Regularly clean your Beats Solo 3 with a soft cloth to remove dirt and oils. Store them in a protective case to prevent damage. Avoid exposure to extreme temperatures and moisture. Handle with care to maintain longevity and performance.

8.1. Cleaning the Headphones

To clean your Beats Solo 3 Wireless Headphones‚ start by turning them off to prevent accidental activation. Use a soft‚ dry microfiber cloth to gently wipe down the surfaces‚ paying special attention to the ear cushions and headband‚ which may accumulate sweat or oil. For stubborn dirt‚ slightly dampen the cloth with water‚ but avoid getting any moisture inside the headphones. Avoid using harsh chemicals or abrasive materials that could damage the finish or harm the electronics. Regular cleaning helps maintain hygiene and prevents dirt buildup‚ ensuring optimal performance and longevity.

8.2. Proper Storage and Handling

Store your Beats Solo 3 Wireless Headphones in a cool‚ dry place‚ away from direct sunlight and moisture. Use the provided carrying case to protect them from scratches and dust when not in use. Avoid bending the headband excessively‚ as this could damage the internal components. Handle the ear cushions and headband with care to maintain their shape and comfort. Never store the headphones in extreme temperatures or humid environments‚ as this may affect battery performance and overall durability. Proper storage and handling ensure your headphones remain in excellent condition for long-term use.

8.3. Battery Care and Optimization

To maintain optimal battery performance for your Beats Solo 3 Wireless Headphones‚ ensure proper charging habits. Avoid letting the battery completely drain to 0% on a regular basis‚ as this can reduce its overall lifespan. Charge your headphones using the provided cable and avoid overcharging‚ as this may cause unnecessary wear. Store the headphones with a charge level between 40% and 80% if they will not be used for an extended period. Keep the headphones away from extreme temperatures‚ as this can affect battery health. Regularly updating the firmware also helps optimize battery performance and overall functionality.

Warranty and Support

Beats Solo 3 Wireless Headphones are backed by a limited warranty covering manufacturing defects. For support‚ visit the official Beats website for online resources‚ manuals‚ and contact options to assist with troubleshooting or repair requests.

9.1. Understanding the Warranty Program

The Beats Solo 3 Wireless Headphones are covered by a limited warranty that protects against manufacturing defects for a specified period. The warranty typically lasts for one year from the date of purchase and covers repairs or replacements due to faulty materials or workmanship. To ensure coverage‚ users must register their headphones through the official Beats website or retain proof of purchase. The warranty does not apply to damage caused by misuse‚ accidents‚ or normal wear and tear. For detailed terms and conditions‚ visit the Beats support page or consult the provided user manual.

9.2. Contacting Beats Support

For assistance with your Beats Solo 3 Wireless Headphones‚ visit the official Beats support website. You can access live chat‚ phone support‚ or submit a request online. The website also offers extensive resources‚ including FAQs‚ troubleshooting guides‚ and user manuals. If you need personalized help‚ contact Beats support directly via phone or chat. Be sure to have your product serial number ready for faster service. Additionally‚ the Beats community forum allows you to connect with other users and experts for tips and solutions. Their support team is available to address warranty claims‚ technical issues‚ and general inquiries.

9.3. Online Resources and Manuals

The Beats Solo 3 Wireless Headphones are supported by a variety of online resources‚ including user manuals‚ setup guides‚ and troubleshooting tips. The official Beats website offers downloadable PDF manuals‚ detailed instructions‚ and FAQs to address common questions. Additionally‚ the Beats Support page provides access to live chat‚ phone support‚ and community forums where users can share experiences and solutions. For more in-depth assistance‚ the Apple Support website also hosts resources for Beats products‚ ensuring comprehensive coverage for all your needs.

workbook for tonal harmony pdf

A comprehensive guide, the Tonal Harmony Workbook offers detailed exercises for understanding harmonic progressions, including SATB and SAB chorus arrangements. Correlated with textbooks and self-tests, it provides practical tools for mastering tonal harmony, from basics to advanced techniques.

What is Tonal Harmony?

Tonal harmony refers to the system of chord progressions and voice leading practices that create a sense of harmonic structure and resolution. It is rooted in the use of diatonic triads and seventh chords within a key center, establishing a hierarchy of harmonic functions. Tonal harmony provides the foundation for Western music, enabling the creation of coherent and emotionally engaging musical compositions. Through the interplay of consonance and dissonance, tonal harmony defines the harmonic language of a piece, guiding listeners through moments of tension and resolution. This concept is central to music theory and composition.

Importance of a Workbook for Tonal Harmony

A workbook for tonal harmony is essential for applying theoretical knowledge to practical exercises. It provides structured tasks to master harmonic progressions, voice leading, and chord functions. By engaging with hands-on problems, students develop analytical and compositional skills. The workbook complements textbooks and self-tests, offering a space for experimentation and reinforcement of concepts. Regular practice through workbook exercises enhances understanding of tonal structure, enabling musicians to create and analyze music effectively. It serves as a foundational tool for both beginners and advanced learners, fostering mastery of harmonic principles in Western music traditions.

Structure of a Typical Tonal Harmony Workbook

A typical workbook is organized by chapters, each focusing on specific harmonic concepts, with exercises progressing from basic to advanced. It includes practical tasks, self-tests, and supplementary materials for comprehensive learning.

Scope and Organization of the Workbook

The workbook is meticulously organized, covering foundational concepts like diatonic triads and seventh chords to advanced chromaticism; Each chapter aligns with corresponding textbook sections, ensuring a logical progression from basic to complex harmony. Exercises are structured to reinforce theoretical knowledge, with practical tasks for SATB and SAB choruses. The workbook also includes self-tests and supplementary materials, enhancing comprehension and application. Its clear structure makes it an essential tool for students seeking to master tonal harmony, providing a comprehensive and progressive learning experience.

Correlation with Textbooks and Self-Tests

The workbook is closely aligned with textbooks and self-tests, ensuring a seamless learning experience. Each exercise corresponds to specific chapters and self-test problems, reinforcing theoretical concepts through practical application. This integration allows students to test their understanding and identify areas for improvement. The correlation enhances retention and skill development, making the workbook an invaluable companion for mastering tonal harmony. By linking exercises to textbook content, it provides a comprehensive and structured approach to learning music theory.

Key Concepts Covered in Tonal Harmony Workbooks

The workbooks cover fundamental concepts like diatonic triads, seventh chords, and chromaticism, providing a solid foundation for understanding harmonic progressions and advanced techniques in tonal music composition and analysis.

Diatonic Triads and Seventh Chords

Diatonic triads and seventh chords form the core of tonal harmony, providing the foundational harmonic material for musical composition. Triads, consisting of a root, third, and fifth, are the building blocks of harmony, while seventh chords add richness and complexity. The workbook explores their construction, functions, and resolutions within key centers, emphasizing their role in creating harmonic progression and emotional depth. Through structured exercises, students master the identification, writing, and analysis of these chords, ensuring a strong grasp of harmonic principles essential for advanced studies in music theory and composition.

Chromaticism and Advanced Techniques

Chromaticism introduces non-diatonic pitches, expanding harmonic possibilities beyond the key. The workbook delves into altered chords, modal interchange, and advanced tonal techniques, offering exercises to navigate chromatic passages and modulations. Students explore how these elements enhance musical expression, preparing them for post-tonal studies. Practical applications, such as arranging jazz standards and analyzing complex scores, reinforce theoretical concepts, equipping musicians with versatile harmonic skills for composition and performance. This section bridges the gap between traditional tonal harmony and modern musical practices, ensuring a comprehensive understanding of chromaticism’s role in contemporary music.

Exercises and Problems in the Workbook

The workbook includes a variety of exercises, from harmonic progressions to open-ended problems, designed to reinforce understanding of tonal harmony principles through practical application and creative challenges.

Types of Exercises for Harmonic Progressions

The workbook features various exercises tailored to harmonic progressions, including diatonic triads, seventh chords, and chromatic techniques. These exercises range from simple chord identification to complex harmonic analysis, ensuring a gradual build-up of skills. Students can practice arranging for SATB and SAB choruses, applying theoretical concepts to real-world scenarios. Additionally, the exercises are complemented by self-tests, allowing learners to assess their understanding independently. This structured approach ensures that students develop both foundational knowledge and advanced harmonic proficiency, making the workbook an essential tool for music theory education.

Open-Ended Problems for Advanced Learning

The workbook includes open-ended problems designed to challenge advanced learners, promoting deep understanding and creative application of tonal harmony. These exercises encourage students to explore complex harmonic techniques, such as chromaticism and post-tonal integration, while applying theoretical concepts to real-world musical scenarios. Problems often involve arranging harmonic progressions for SATB and SAB choruses, allowing students to refine their skills in voice leading and harmonic structure. This approach fosters critical thinking and prepares students for master’s-level studies in music composition and theory, ensuring a seamless transition to advanced musical endeavors.

Practical Applications of Tonal Harmony

The workbook aids musicians in applying tonal harmony to real-world scenarios, such as arranging for SATB and SAB choruses, and analyzing jazz standards, enhancing compositional skills.

Arranging for SATB and SAB Choruses

The Tonal Harmony Workbook is an essential resource for musicians seeking to master arranging for SATB and SAB choruses. It provides detailed exercises tailored to these ensembles, helping to develop practical skills in harmonic progression and vocal arrangement. Each exercise set aligns with corresponding textbook chapters and self-tests, ensuring a comprehensive learning experience. Open-ended problems encourage creativity and deeper understanding, making it an invaluable tool for both students and professionals in music composition and theory. Additionally, the workbook’s structured approach caters to both beginners and advanced learners, reinforcing foundational concepts while introducing complex techniques. This comprehensive guide is indispensable for anyone looking to enhance their choral arranging abilities.

Jazz Standards and Tonal Harmony Worksheets

Jazz standards play a pivotal role in tonal harmony workbooks, offering real-world applications of harmonic principles. Resources like the mDecks Music Workbook provide over 1,300 fully analyzed jazz standards, transforming them into practical tonal harmony worksheets. These exercises enable musicians to explore harmonic progressions, voice leading, and chromatic techniques within iconic jazz compositions. By studying these standards, learners gain insights into how tonal harmony is applied in diverse musical contexts. This approach bridges theory and practice, making it an invaluable tool for composers, improvisers, and music theorists alike. The integration of jazz standards enriches the learning experience, fostering a deeper understanding of harmonic structures.

Resources for Tonal Harmony Workbooks

Download the Workbook for Tonal Harmony PDF, including supplementary materials, from McGraw-Hill Education. The 8th edition by Stefan Kostka is available online in PDF or hardcover.

Download Links and Availability

The Workbook for Tonal Harmony PDF is widely available online. Platforms like McGraw-Hill Education offer the 8th edition, authored by Stefan Kostka, in both PDF and hardcover formats. Additionally, sites like example.com provide direct download links for the PDF version. Users can also access supplementary materials, ensuring comprehensive study resources. Availability is consistent across major educational retailers, making it easily accessible for students and educators alike.

Supplementary Materials and Tools

Supplementary materials for the Workbook for Tonal Harmony include self-tests, answer keys, and interactive tools. McGraw-Hill Education offers online resources to complement the workbook. Additionally, mDecks Music provides over 1,300 Jazz Standards as analyzed worksheets. These tools enhance learning by offering practical applications of harmonic principles. Furthermore, the workbook integrates with post-tonal music concepts, ensuring a well-rounded education. These resources are available on the publisher’s website and select educational platforms, supporting both students and instructors in music theory education.

Workbook for Tonal Harmony by Stefan Kostka

Stefan Kostka’s workbook is a comprehensive resource for understanding tonal harmony, featuring detailed exercises and practical applications. Published by McGraw-Hill, it integrates post-tonal concepts seamlessly.

Features of the 8th Edition

The 8th edition of Stefan Kostka’s workbook includes enhanced exercises, updated examples, and an expanded introduction to post-tonal music. It offers improved clarity, new topics, and practical applications for SATB and SAB choruses. Students benefit from self-tests and detailed solutions, while instructors appreciate the curriculum alignment. The workbook also includes advanced techniques like chromaticism and jazz standards analysis, making it a versatile tool for both foundational and advanced learning in tonal harmony.

Integration with Post-Tonal Music

The workbook seamlessly integrates post-tonal music concepts, offering insights into 20th-century techniques and their analysis. Exercises bridge tonal harmony with post-tonal elements, allowing students to explore modern musical styles. This integration enhances understanding of musical evolution and equips musicians with versatile compositional skills, aligning with advanced curriculum needs.

Different Editions of the Workbook

The workbook is available in multiple editions, with the 7th and 8th editions being the most widely used. The 8th edition introduces post-tonal music concepts, enhancing the learning experience.

7th Edition vs. 8th Edition

The 7th edition of the workbook focuses on traditional tonal harmony concepts, offering foundational exercises for students. In contrast, the 8th edition expands on this by incorporating post-tonal music elements, providing a broader understanding of harmonic techniques. The 8th edition includes updated exercises and enhanced coverage of advanced topics, making it a more comprehensive resource for modern music education. Both editions are widely used, but the 8th edition is preferred for its expanded scope and relevance to contemporary musical studies.

Updates and Improvements in Recent Editions

Recent editions of the workbook feature expanded content on post-tonal music, offering a more comprehensive understanding of modern harmonic techniques. Exercises have been updated to reflect diverse musical styles, enhancing practical application. Additional resources, such as supplementary materials and digital tools, support deeper learning. Improved integration with textbooks ensures a cohesive study experience. These updates make the workbook more versatile for both traditional and contemporary music education, addressing the evolving needs of students and educators in the field of tonal harmony.

Importance of Tonal Harmony in Music Education

Tonal harmony forms the foundational knowledge for musicians, providing essential skills in understanding harmonic structures. It prepares students for advanced musical studies and enhances their ability to analyze and compose music effectively.

Foundational Knowledge for Musicians

Tonal harmony serves as the core foundation for musicians, enabling them to understand and analyze musical structures. It equips students with essential skills in chord progressions, voice leading, and composition. By mastering diatonic triads, seventh chords, and harmonic functions, musicians gain the ability to interpret and create music effectively. The Workbook for Tonal Harmony provides practical exercises that reinforce these concepts, ensuring a solid grasp of harmonic principles. This foundational knowledge is crucial for both performance and composition, making it a cornerstone of music education and a vital tool for aspiring musicians.

Preparation for Advanced Musical Studies

The Workbook for Tonal Harmony excels in preparing students for advanced musical studies by integrating post-tonal music concepts. It bridges theory and practice, offering exercises that enhance understanding of complex harmonic structures. Students gain proficiency in arranging for SATB and SAB choruses, essential for ensemble settings. The workbook’s correlation with self-tests and textbooks ensures a comprehensive grasp of harmonic principles, equipping musicians for composition, analysis, and performance. Its focus on chromaticism and advanced techniques prepares learners for the challenges of modern music, making it an indispensable resource for those pursuing higher-level musical education and professional development.

The Workbook for Tonal Harmony is an invaluable resource for musicians, offering comprehensive exercises that enhance understanding of tonal harmony and post-tonal music. Its practical applications, such as arranging for SATB and SAB choruses, make it a must-have for all levels of musical study.

Final Thoughts on Tonal Harmony Workbooks

The Workbook for Tonal Harmony is a comprehensive resource for mastering harmonic principles, offering detailed exercises and practical applications. It bridges theory and practice, catering to musicians of all skill levels. With its correlation to textbooks and self-tests, it ensures a structured learning experience. The inclusion of advanced techniques and post-tonal music integration makes it versatile for modern studies. Available in multiple editions, including the 8th edition with updated features, it remains a cornerstone for music education. Its availability in PDF and supplementary materials further enhances accessibility, making it an indispensable tool for understanding and applying tonal harmony effectively.

How to Proceed with Your Studies

Begin by mastering foundational concepts in the Workbook for Tonal Harmony, focusing on diatonic triads and seventh chords. Progress to chromaticism and advanced techniques, utilizing exercises tailored for SATB and SAB choruses. Leverage the 8th edition’s updated features, including post-tonal music integration. Practice regularly, correlating workbook exercises with textbook chapters and self-tests. Apply harmonic principles to real-world scenarios, such as jazz standards. Use supplementary materials for deeper understanding. Stay consistent, review each chapter thoroughly, and seek guidance when challenges arise to ensure a robust grasp of tonal harmony.

www.skytechgaming.com/starting-guide

Gaming PCs offer unparalleled performance for gaming‚ content creation‚ and multitasking‚ combining powerful hardware with customization. This guide helps you understand and optimize your setup for the best experience.

What Is a Gaming PC?

A gaming PC is a high-performance computer designed specifically for running demanding video games smoothly. It typically features a powerful GPU‚ fast CPU‚ ample RAM‚ and optimized cooling systems. Unlike standard PCs‚ gaming PCs are built to handle high-resolution graphics‚ fast frame rates‚ and immersive gameplay experiences. They often include customizable components‚ RGB lighting‚ and advanced cooling solutions to maintain peak performance during long gaming sessions. These systems are also easily upgradable‚ allowing users to enhance their hardware over time to keep up with evolving game requirements and technological advancements.

Benefits of Owning a Gaming PC

Owning a gaming PC offers high performance for gaming‚ content creation‚ and multitasking. It provides customization options‚ upgradability‚ and versatility for various applications. With a gaming PC‚ you can enjoy smooth gameplay‚ run demanding software‚ and multitask efficiently. It also serves as a future-proof investment‚ allowing you to upgrade components over time. Additionally‚ gaming PCs often have better resale value compared to consoles. The ability to overclock hardware and access a wide range of mods enhances the gaming experience. Overall‚ a gaming PC is a powerful tool for both entertainment and productivity‚ catering to diverse user needs beyond just gaming.

Key Components of a Gaming PC

A gaming PC consists of several essential components that determine its performance. The CPU (Central Processing Unit) handles processing tasks‚ with popular options including AMD Ryzen and Intel Core series. The GPU (Graphics Processing Unit) is crucial for rendering graphics‚ with NVIDIA GeForce and AMD Radeon being top choices. RAM (Memory) ensures smooth multitasking‚ typically 16GB or more for gaming. Storage options like SSDs offer faster load times. The PSU (Power Supply Unit) provides stable power‚ while cooling systems (air or liquid) maintain optimal temperatures. Each part must be selected carefully to ensure compatibility and peak performance.

Choosing the Right Components

Selecting the right CPU‚ GPU‚ RAM‚ and PSU ensures optimal performance. Consider your gaming needs‚ budget‚ and future upgrades to build a balanced and powerful system.

How to Select a CPU for Gaming

Selecting the right CPU for gaming is crucial for smooth performance. Look for a processor with multiple cores (at least 4-6) and high clock speeds (above 3.0 GHz) to handle modern games. AMD Ryzen and Intel Core i5/i7 series are popular choices. Ensure the CPU is compatible with your motherboard and other components. Prioritize single-thread performance for gaming‚ but multi-threaded CPUs are beneficial for multitasking. Consider future-proofing by choosing a CPU that supports the latest technologies. Pairing your CPU with a strong GPU ensures optimal gaming performance and prevents bottlenecking.

GPU: The Heart of Your Gaming PC

The GPU (Graphics Processing Unit) is the core of your gaming PC‚ driving stunning visuals and smooth performance. Modern GPUs like NVIDIA’s RTX 4060 or AMD’s Radeon RX 7600 handle demanding games and content creation. Proper cooling is crucial to prevent crashes‚ as seen in some SkyTech Gaming PC issues. Ensure your GPU has adequate cooling and stay updated with drivers for optimal performance. A high-quality GPU ensures immersive gaming and multitasking efficiency‚ making it a critical investment for any gaming setup.

RAM and Storage Options

Choosing the right RAM and storage is crucial for gaming performance. Aim for at least 16GB of DDR4 RAM for smooth multitasking and gaming. For high-end systems‚ 32GB or more is recommended. DDR4 remains popular‚ but DDR5 offers faster speeds for future-proofing. For storage‚ NVMe SSDs provide blazing-fast load times‚ while SATA SSDs are more affordable. HDDs are viable for large storage needs but slower. Consider a 1TB NVMe SSD as a primary drive for your OS and games‚ paired with an HDD for additional storage if needed. Balancing speed and capacity ensures optimal performance and convenience.

Power Supply Unit (PSU)

The Power Supply Unit (PSU) is a critical component that delivers power to all parts of your gaming PC. It converts AC power from the wall outlet to DC power for your hardware. When selecting a PSU‚ consider the wattage required by your components‚ ensuring it matches or exceeds the total power demand. Efficiency ratings‚ such as 80 Plus certifications‚ indicate higher efficiency and less heat generation. Modular PSUs allow for cleaner cable management by only using the necessary cables. A reliable PSU is essential for system stability and future upgrades‚ so choose a reputable brand to avoid potential crashes or hardware damage.

Cooling Systems: Air vs. Liquid

Cooling systems are crucial for maintaining optimal temperatures in your gaming PC. Air cooling uses fans and heat sinks to dissipate heat‚ offering simplicity and affordability. Liquid cooling‚ however‚ employs water or coolant to absorb and transfer heat‚ providing superior efficiency for high-performance systems. While air cooling is easier to install and maintain‚ liquid cooling is quieter and better for overclocking. Both systems have their pros and cons‚ so choose based on your PC’s performance needs and budget. Proper cooling ensures hardware longevity and prevents issues like black screens or crashes during intense gaming sessions.

Building or Buying a Gaming PC

Deciding between building and buying a gaming PC involves balancing cost‚ customization‚ and convenience. Building offers control and upgrades‚ while prebuilt systems provide ease and reliability.

Pros and Cons of Building a PC

Building a gaming PC offers customization‚ cost-effectiveness‚ and future-proofing. You can handpick components like the CPU‚ GPU‚ and RAM to meet your needs. It also allows for easier upgrades and better performance. However‚ building requires technical knowledge and time. There’s no warranty on individual parts‚ and troubleshooting can be challenging. Additionally‚ sourcing components can be complex‚ and initial costs may be high. Despite these challenges‚ building provides long-term flexibility and satisfaction for enthusiasts. It’s ideal for those seeking tailored performance and control over their setup.

Pros and Cons of Buying a Prebuilt PC

Buying a prebuilt PC offers convenience and ease‚ as it arrives fully assembled and ready to use. Many prebuilt systems‚ like those from Skytech Gaming‚ come with warranties and are thoroughly tested. They often include premium components and optimized cooling systems. However‚ prebuilt PCs may limit upgradability and customization compared to building your own. Costs can also be higher due to markup‚ and you might pay for features you don’t need. Despite this‚ prebuilt PCs remain a great option for those seeking a hassle-free experience with reliable performance.

Customization Options for Prebuilt PCs

Prebuilt gaming PCs often offer surprising customization potential. Users can upgrade components like RAM‚ storage‚ or GPU to enhance performance. RGB lighting systems‚ controlled by dedicated hubs near the PSU‚ allow for aesthetic tweaks. Some prebuilt PCs even support overclocking for improved speed. Additionally‚ software customization enables personalized fan curves and lighting effects. Upgrading to future-proof hardware ensures longevity‚ though compatibility must be verified. Many manufacturers provide support for such modifications‚ making prebuilt PCs a flexible choice for gamers seeking a balance between convenience and personalization.

Setting Up Your Gaming PC

Begin with unboxing and connecting peripherals‚ then install the operating system and essential drivers. Ensure proper connectivity for internet and accessories to complete the setup successfully.

Unboxing and Initial Setup

Unboxing your gaming PC is an exciting first step. Carefully unpack all components‚ ensuring no damage occurred during shipping. Inspect the PC for any visible issues. Connect the power cord to the PSU‚ located near the bottom or back of the case. Plug in peripherals like the keyboard‚ mouse‚ and monitor. If your PC has RGB lighting‚ the controller is often near the PSU. Finally‚ press the power button to boot up your system for the first time. Ensure all fans are spinning and lights are operational before proceeding to software setup.

Installing Operating System and Drivers

Installing the operating system and drivers is a critical step in setting up your gaming PC. Start by inserting the OS installation media‚ then follow on-screen instructions to install Windows or your preferred OS. Once installed‚ download the latest drivers from the manufacturer’s website or use the provided installation discs. Key drivers include GPU‚ CPU‚ and motherboard drivers. Ensure all components are recognized by the system. Restart your PC after installation to apply changes. For SkyTech PCs‚ visit their official website for specific driver downloads to optimize performance and compatibility.

Connecting Peripherals and Accessories

Connecting peripherals and accessories to your gaming PC is straightforward. Start by plugging in your keyboard‚ mouse‚ and monitor into the appropriate USB and HDMI ports. Ensure your RGB fans or strips are connected to the RGB controller‚ often linked to the PSU or motherboard. For network connectivity‚ use Ethernet for a stable connection or Wi-Fi for convenience. Finally‚ install drivers for all devices from the manufacturer’s website or the CD provided. Test your setup to ensure everything works smoothly‚ and customize lighting or macros through software if available.

Troubleshooting Common Issues

Common problems include black screens‚ crashes‚ and connectivity issues. Check drivers‚ ensure proper cooling‚ and verify network settings to resolve these frustrations effectively and quickly.

Fixing Black Screens and Crashes

Black screens and crashes in gaming PCs can stem from various issues‚ such as overheating‚ outdated drivers‚ or insufficient power supply. First‚ ensure all internal components are securely connected. Check GPU and CPU temperatures using monitoring software. Update graphics drivers to the latest version‚ as outdated ones often cause crashes. If overclocking‚ revert settings to default or test stability with stress-testing tools. For prebuilt systems like SkyTech PCs‚ contact customer support for diagnostic assistance. Regularly cleaning dust from vents and ensuring proper cooling can also prevent such issues.

Resolving Connectivity Problems

Connectivity issues can hinder your gaming experience. Start by checking physical connections‚ ensuring cables are securely plugged in. Restart your router and modem to refresh the connection. Update network drivers to the latest version for optimal performance. Disable and re-enable the network adapter through your OS settings. Check firewall or antivirus settings that might block connectivity. If issues persist‚ reset network configurations to default or contact your ISP for assistance. For wireless problems‚ consider using a wired connection for stability. These steps help diagnose and resolve common connectivity problems effectively.

Optimizing Performance

Optimizing your gaming PC’s performance involves tweaking settings‚ overclocking your GPU‚ and enhancing cooling. These adjustments ensure smoother gameplay and maximize your system’s potential effectively.

Overclocking Your GPU

Overclocking your GPU enhances performance for smoother gaming and better frame rates. Use software like MSI Afterburner to adjust MHz and memory settings. Start with small increments‚ monitor temperatures‚ and test stability with tools like Unigine Heaven. Ensure proper cooling to prevent overheating. Overclocking voids warranties but can optimize performance. Research optimal settings for your GPU model to avoid damage. Stability is key; if crashes occur‚ revert or adjust. Regular monitoring with tools like HWiNFO helps maintain performance without risks. Overclocking requires patience and careful tuning for best results.

Improving Cooling Efficiency

Improving cooling efficiency is crucial for maintaining optimal performance and extending your gaming PC’s lifespan. Regularly clean dust from fans‚ heat sinks‚ and vents to ensure proper airflow. Consider upgrading to a high-quality cooling system‚ such as liquid cooling‚ for better heat dissipation. Ensure your case has adequate ventilation and that fans are properly configured for intake and exhaust. Monitoring temperatures during gameplay or resource-intensive tasks can help identify potential issues. Additionally‚ consider using thermal paste for your CPU and GPU to enhance heat transfer efficiency. A well-cooled system reduces thermal throttling‚ ensuring consistent performance.

Maintaining Your Gaming PC

Regular cleaning‚ dust removal‚ and cable management are crucial for optimal performance. Neglecting maintenance can lead to overheating and reduced lifespan‚ ensuring proper care extends your PC’s longevity.

Cleaning Your PC

Regularly cleaning your gaming PC is essential to maintain performance and prevent overheating. Turn off and unplug your PC before cleaning. Use compressed air to gently remove dust from vents‚ fans‚ and internal components. Avoid spraying liquids directly on parts; instead‚ dampen a cloth for wiping surfaces. Clean the exterior case and peripherals with a soft brush or microfiber cloth. For tougher grime‚ a mild soap solution on a damp cloth can be used. Regular cleaning ensures optimal airflow and keeps your system running smoothly. Schedule cleaning every 2-3 months to maintain peak performance and longevity.

Monitoring Hardware Health

Monitoring your gaming PC’s hardware health is crucial for optimal performance and longevity. Use tools like GPU-Z‚ HWMonitor‚ or software provided by manufacturers to track temperatures‚ voltages‚ and usage. Regularly check for firmware updates and ensure drivers are up-to-date. Overheating can cause black screens or crashes‚ so maintain proper cooling. Storage health can be monitored via SMART data‚ while RAM integrity can be tested with MemTest86. Addressing issues early prevents hardware failure and ensures smooth gaming experiences. Keeping an eye on these metrics helps you make informed decisions for upgrades or repairs‚ extending your PC’s lifespan and performance.

Upgrading Your Gaming PC

Upgrading your gaming PC enhances performance and extends its lifespan. Consider upgrading your GPU‚ RAM‚ or storage for better gaming experiences and future-proofing your setup effectively.

When to Upgrade Your Hardware

Upgrade your hardware when performance declines or new games demand better specs. Consider upgrading if you experience frequent crashes‚ lag‚ or outdated software compatibility. If your GPU struggles with modern titles or your CPU bottlenecks performance‚ it’s time to upgrade. Additionally‚ if you want to future-proof your PC or adopt new technologies like ray tracing or AI enhancements‚ upgrading key components ensures optimal gaming experiences. Assess your needs and budget before making changes to maximize your PC’s potential.

Future-Proofing Your Build

Future-proofing your gaming PC ensures it remains relevant for years. Invest in a robust GPU and CPU‚ as they are key to handling future games. Opt for upgradable components and consider modular designs. Prioritize scalable storage solutions like NVMe SSDs. Stay updated with the latest trends in hardware and software. Regular maintenance‚ such as cleaning and monitoring temperatures‚ extends component lifespan. Balance performance needs with budget to avoid premature obsolescence. By planning ahead‚ you can enjoy smooth gaming and productivity without frequent upgrades‚ saving time and money in the long run. This approach keeps your PC efficient and adaptable to evolving demands;

Thank you for exploring the world of gaming PCs! With proper setup‚ maintenance‚ and upgrades‚ your PC will deliver exceptional performance. Stay curious and enjoy gaming!

Final Tips for New PC Owners

Regularly clean your PC to prevent dust buildup and ensure optimal airflow. Monitor temperatures and update drivers frequently for peak performance. Always backup important data to avoid losses. Consider investing in surge protection for your hardware. Explore customization options like RGB lighting or overclocking to personalize your experience. Stay informed about the latest software updates and hardware trends. Join online communities for troubleshooting and advice. Prioritize quality peripherals for an enhanced gaming experience. Lastly‚ enjoy the versatility of your gaming PC—it’s not just for gaming but also for productivity‚ streaming‚ and creativity!

Staying Updated with PC Gaming Trends

Keeping up with the latest PC gaming trends is essential for maximizing your gaming experience. Regularly check forums‚ YouTube‚ and manufacturer websites for updates on hardware advancements‚ performance optimizations‚ and new technologies. Trends like GPU overclocking‚ improved cooling systems‚ and future-proofing your build are crucial for long-term satisfaction. Stay informed about the latest games and system requirements to ensure your PC remains capable of handling demanding titles. Engaging with the gaming community and following trusted sources will help you make informed decisions and keep your setup current.